As the name suggests, permissions are used for users or groups of users to allow or restrict the access of some or the whole part of your website in SharePoint. It comes with a very easy Out of the box UI to share the content. We can also use some of the APIs to easily grant access.
Understand Permission in SharePoint
Definition: To give Permission means to allow someone to do a thing officially.
You need a mechanism in your content management system where the access rights on the content are based on the user roles and responsibility, correct?
For example, let’s say you have a Document Library on which you want to give Edit access to managers and Read access to the rest of the users. So, what you can do is you can create 2 groups. One with Edit access (Managers’ Group) and one with only Read access (Users’ Group).
What are the SharePoint Permission Levels?
Definition: Permission Level is a set of individual permissions a user or a group can be assigned.
In SharePoint, you can directly use Permissions, or you can create permission level using many permissions (Custom Permission Level)
For example, you can view the document and Approve the document, but you cannot edit the document, so in this case, you need a Permission Level with two permissions (Read and Approve).
What is SharePoint Group?
Definition: A SharePoint Group is a collection of users who all are having the same set of permission levels throughout the site and site content.
Scenario 1: let’s say you have 10 approvers for your SharePoint site. Every time you create any library, you will have to add all of them manually for approving the content, correct? That’s a bit tedious job. So, to simplify, create a SharePoint Group called Content-Approvers. Add all the 10 users in that group. Now, whenever you add a library you just need to use this group instead of adding users all the time. Simple!
Scenario 2: let’s say after a month or so, 5 approvers leave the organization and 5 new users join. You can directly remove and add the users from that group only. You don’t need to manually go to each library and remove/add users.
How do Permissions work in SharePoint?
Creating a structure of permission in SharePoint is a necessary and simple task. You just need to follow these 5 simple steps.

- First, you need to Create permission levels according to your requirement.
- Then you can create groups and assign a permission level to the group
- You need to add users into the group
- Assign the groups to site, list, list items.
Inheritance of Permissions in SharePoint.
- In SharePoint, you can assign permissions at
- Site (Site Collection) level
- Sub-Site Level
- List Level
- List Item Level

- As shown in the screenshot, Whatever permission you create at the Site (Site Collection) level, gets inherited to Sub Site. Same way to List/Library and to List Items.
- Now if you don’t want to assign the same permission at the lower level of hierarchy then you need to Break the inheritance chain which is called Break Role Inheritance.
How to access permission Levels?
- Go to Site Settings as a Site Collection Administrator.
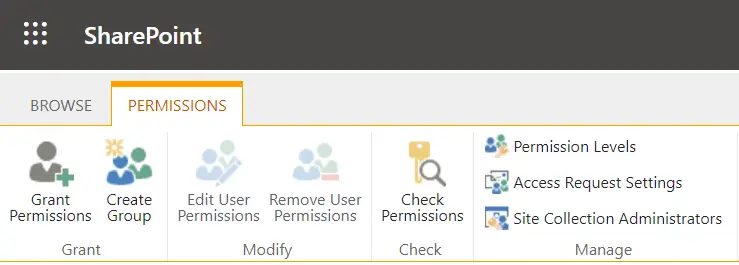
- Click on Site Permissions
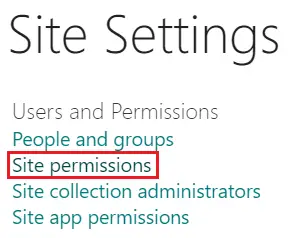
- From the Ribbon Control, Click on Permission Levels
How to Create and Edit Permission Levels in SharePoint?
- As mentioned in the above steps, go to Permission Levels.
- Click on Add a Permission Level
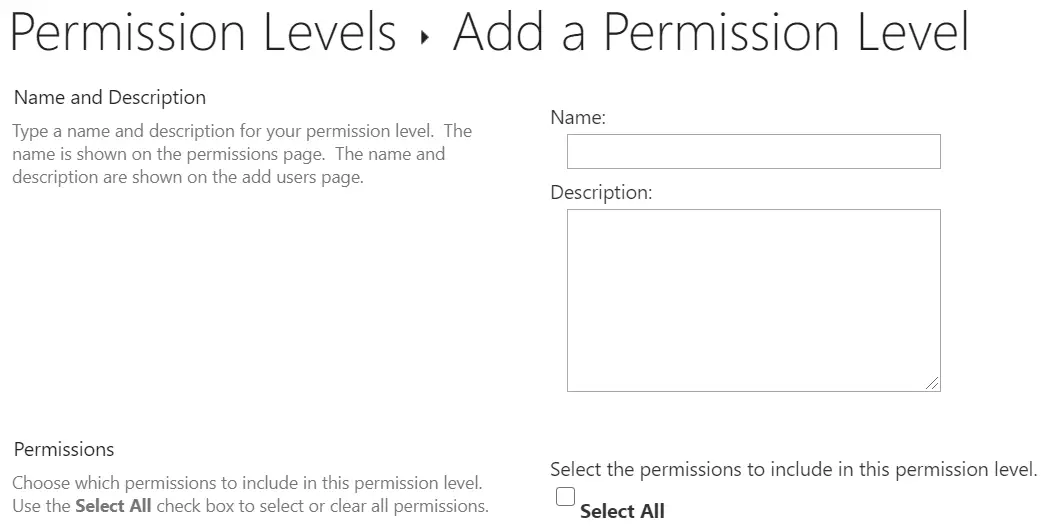
- In this window, you need to enter
- Name: Enter the name of your customer Permission Level
- Description: Describe the new Permission level so it is easy to understand exactly what this new permission level is for.
- Select set of Permissions: You need to select all the permissions that you want to add to this Permission Level.
- Select All: Use the Select All check box to select or clear all permissions
- List Permissions: List Permissions apply to the SharePoint Lists and Document Library in the current site and subsite.
- Site Permissions: Site Permission applies to the permissions across the SharePoint Site
- Personal Permissions: Personal Permissions apply to the individual user.
- That’s the way to create it.
- If you want to Edit an existing Permission Level you can click on that from the permission level screen, make changes and update it.
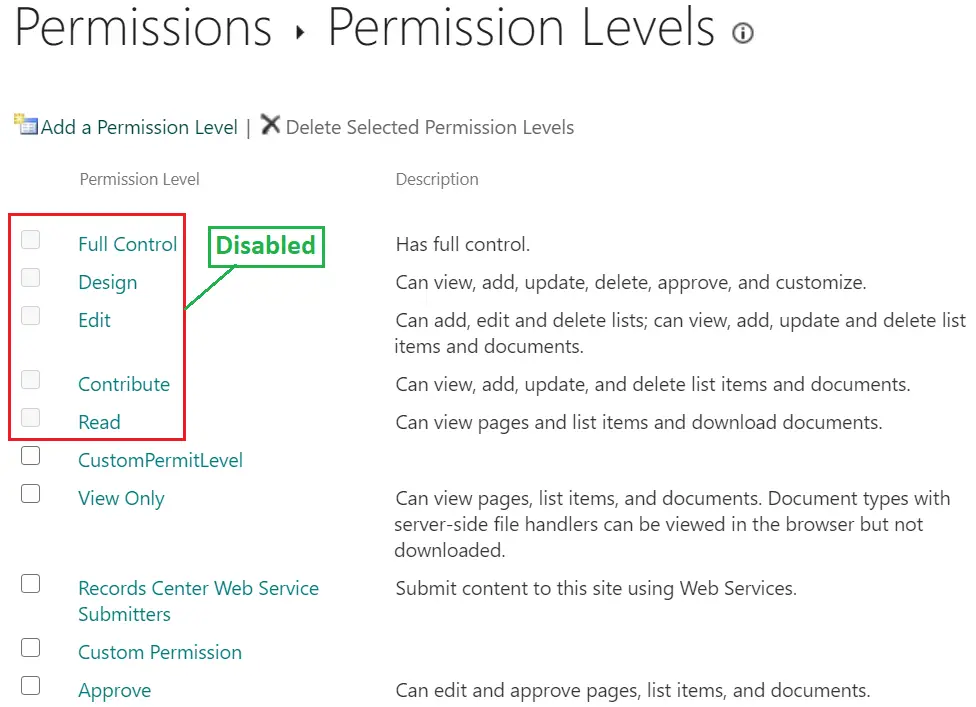
- You can see some of the permission levels are disabled because they are OOB permission levels and you cannot edit them.
How to Create a SharePoint group?
This group will be available throughout the Site Collection.
- Go to Site Settings.
- Click on Site Permissions
- Click on Create Group from the Ribbon.
- Enter the details on the screen.
- Name and Description: Type a name and description for the group
- Owner: The owner can change anything about the group such as adding and removing members or deleting the group. Only one user or group can be the owner.
- Group Settings: Specify who has permission to see the list of group members and who has permission to add and remove members from the group.
- Membership Requests: Specify whether to allow users to request membership in this group and allow users to request to leave the group. All requests will be sent to the e-mail address specified. If auto-accept is enabled, users will automatically be added or removed when they make a request.
- Give Group Permission to this Site: Specify the permission level that you want members of this SharePoint group to have on this site. If you do not want to give group members access to this site, ensure that all checkboxes are unselected
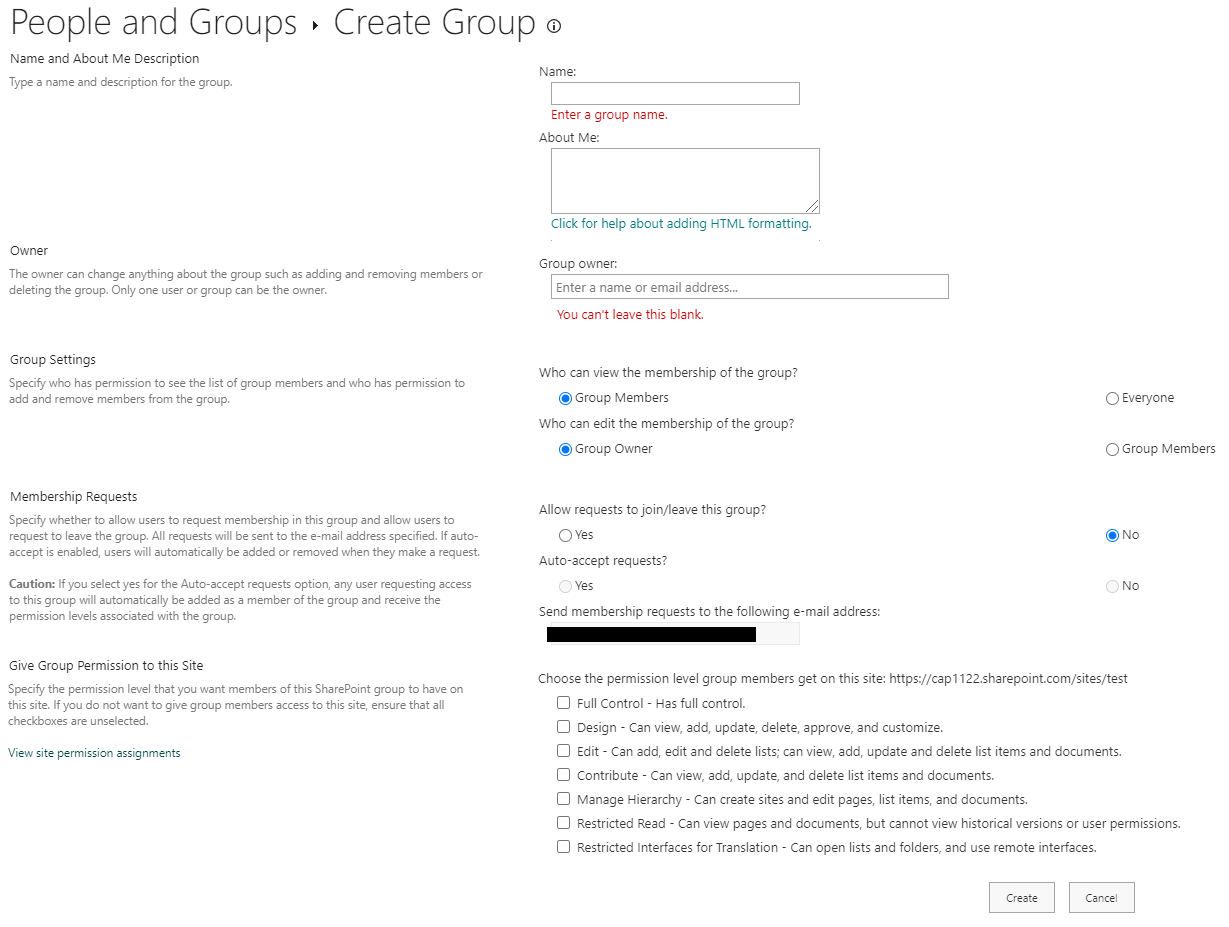
- Click on Create, Your Group is created.
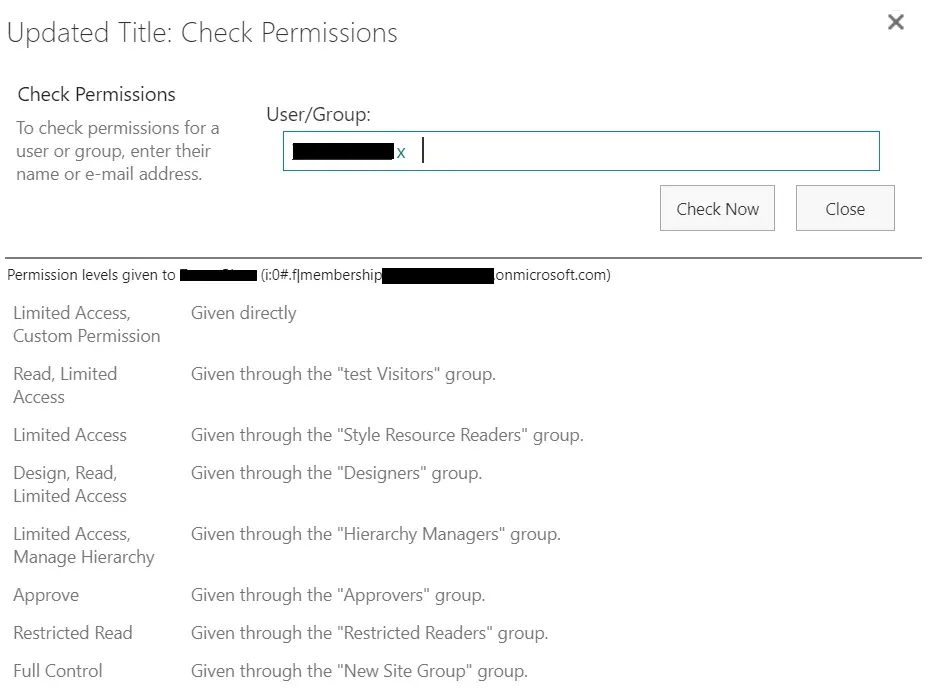
How to Check User or Group Permission on Site?
- Go to Site Settings
- Click on Site permissions
- Click on Check Permissions from Ribbon.
- A pop-up will open.
- Enter the ID of the User or Group. It will display all the places and Permission levels where the user/group is having access.
SharePoint Access Request Settings
This is used to manage Access requests that you receive for the current site.
- Go to Site Settings
- Click on Site permissions
- Click on Access Request Settings from Ribbon.
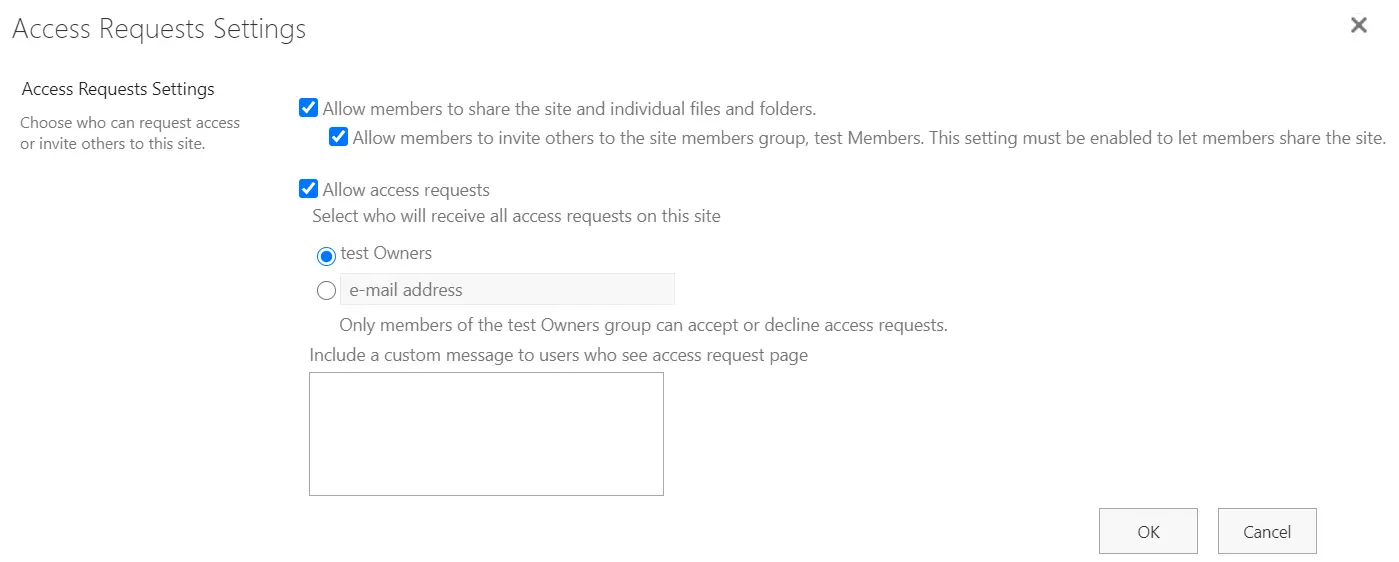
- A pop-up will open. On this screen, you can decide who all can request access or invite others to this site.
- First Option: Default is ticked here. You can decide if Members of the site can Share the site, files, and folders.
- Second Option: Allow members to invite others to the site members group. This setting must be enabled to let members share the site
- Allow access requests: You can allow access requests to this site, also you can include a custom message.
SharePoint Site Collection Administrator
- Every SharePoint site must have a Primary Site Collection Administrator.
- A Site collection administrator has full rights to the entire Site Collection.
- Site Collection Administrator (SCA) can be thought of as an Owner of the Highest Level.
- SCA has ultimate control over each and every resource (site, subsite, list, library, permissions, groups, etc...)