In any data management system, we use a table structure to properly maintain and access data across the system. In SharePoint also, we use SharePoint columns for the same purpose. Let’s go into detail about the SharePoint columns, data types it offers, how to create them, and more.
SharePoint Columns
SharePoint columns are used to store the metadata of the entities. You create a List/library>> and for each record, in that list, you add metadata. For that, we use columns in SharePoint.
How to create a site column in SharePoint?
- Go to Site Settings
- Click on Site Columns under Web Designer Gallery.
- Click on Create.
- Enter all the details.
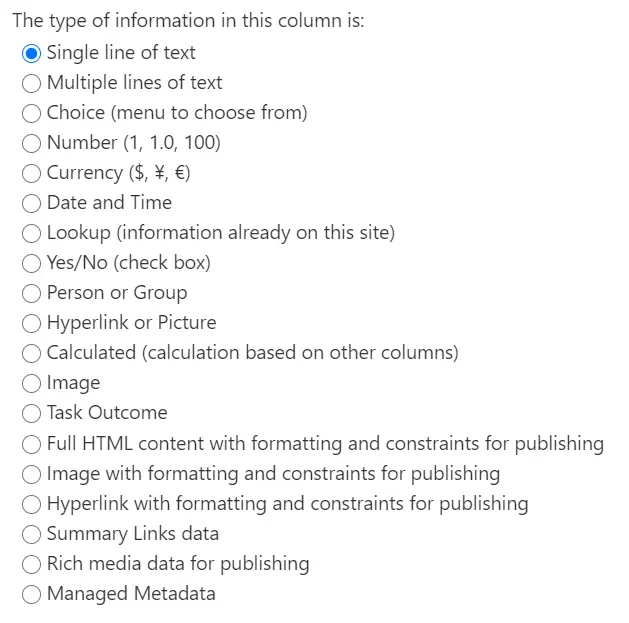
- Name and Type: Enter the column name and choose the type of the column.
- Group: Specify a site column group. Categorizing columns into groups will make it easier for users to find them
- Additional Column Settings:
- Description: Enter the description of the column. This is optional.
- Require that this column contains information: Select if the column value is mandatory or you can leave it blank while adding data.
- Enforce unique values: Select if the column values will be unique or there can be duplicate values.
- Default Value: You can also set the default value for the column.
- Column Formatting: You can change the display of this column by adding JSON in the box. If you don't want the formatting, you can remove the text from the box.
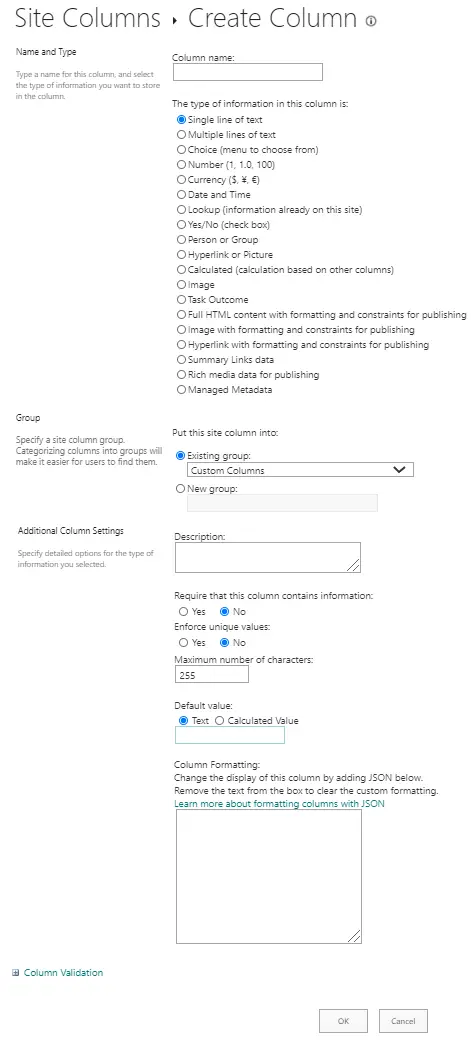
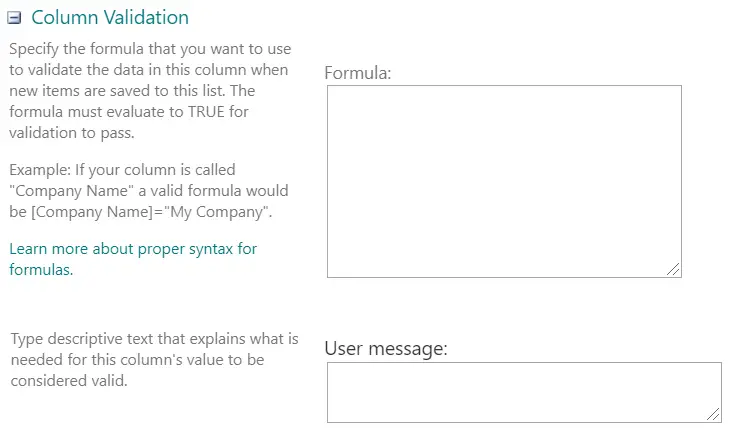
- Column validation: You can see there is an option for column validation, just expand that
- Formula: You can specify some formulas to validate the text entered by the user.
- User message: When users are entering the data, this message will be displayed to them to help them understand about the column.
- After filling in all the information, click on OK.
- Your column is created.
How to edit the site column in SharePoint?
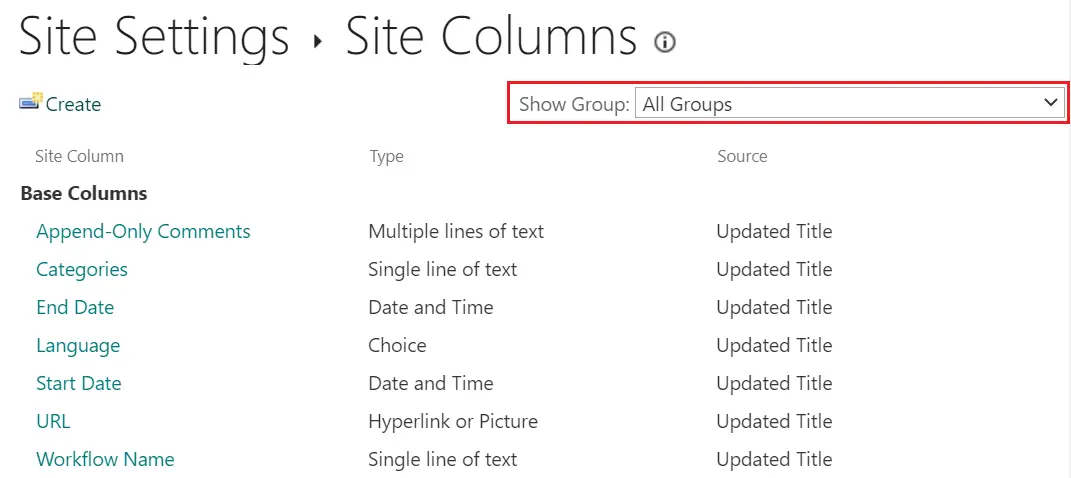
- Go to Site Settings
- Click on Site Columns under Web Designer Gallery.
- You can also change the group of the column from the top right side to narrow down the search.
- Click on the column you want to edit.
- Now you can edit the column.
SharePoint column internal name and display name.
- When you create a column, at that time whatever text you enter in the column name, SharePoint will take that as Internal name as well as the Display name.
- If you want to change the display name of the column, you can again go to Site Settings >> Site Columns >> Click on the column >> Update the name. This way you can update the display name.
- You can update the column display name but not the internal name. What you enter the first time, will be the column internal name forever.
- So, make sure you don’t add any extra space or any character that you don’t want as the internal name
- g. if you enter column Name: First Name, then the internal name will be First%20Name, which is not friendly because we will require an internal name most of the time when we are programming with columns.
- What you can do is create a column with FirstName then again go and update the column with the First Name. That way the internal name will be FirstName and the display name will be the First Name.
Add Site Column to List or Library
- Go to the list or library where you want to add an existing site column.
- Click on List settings.
- On the settings page, scroll down and go to the columns section.
- Click on Add from existing site columns
- A window will open where you need to pick the columns and click on Add.
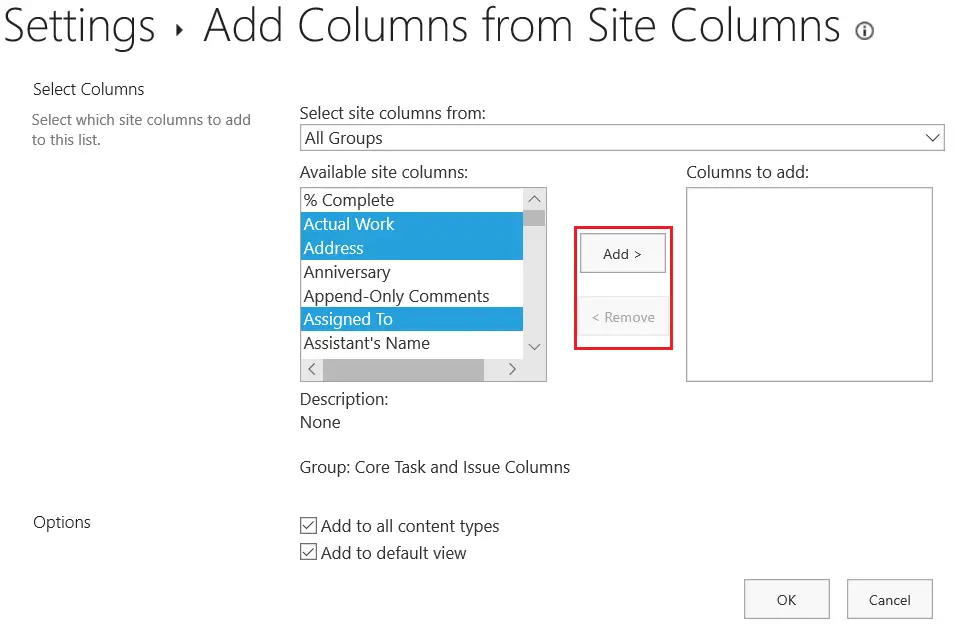
- There’s an option called Add to default view which will add your selected column in the list default view.
- There’s another option called: Add to all content types. If Content types are enabled for the list/library, then the selected columns will be added in all the list content types if set to true.
- Click on OK. Your Site columns are added to the list.
SharePoint indexed column
- When the list grows and if you apply filters on those kinds of heavy lists, the performance of the list may deteriorate.
- If you use Index in your list, you can increase the performance when you are using filters.
- You can add up to 20 indices on columns per list or library.
- It is recommended to add an index only when it is required and not keep adding unnecessary indices.
How to create a new Index in the SharePoint list
- Go to SharePoint list/library settings.
- Scroll down to the columns section.
- Click on Indexed columns.
- A page will open. You will see any existing index over there. You can also create the index from the same page.
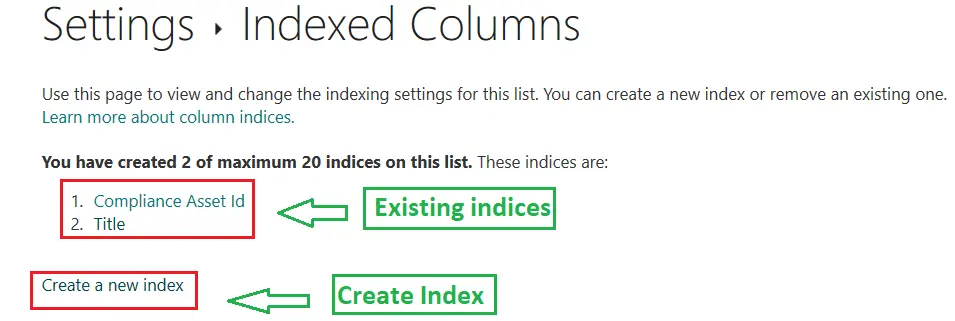
- To Create New Index:
- Click on Create a new index
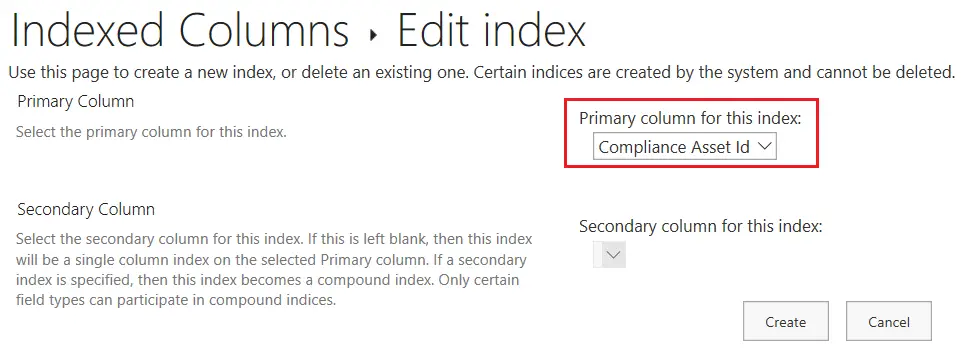
- To create a simple index, select a column that is not a Lookup column in the Primary Column section, under the Primary column for this index.
- To create a compound index, select a lookup column as the primary column for this index. Use a different column that is not a Lookup column in the Secondary Column section, under the Secondary column for this index.
- Remove an existing Index:
- Click on any of the existing indices.
- Click on Delete.
SharePoint calculated column
- SharePoint gives you the facility to modify column values based on the other columns in the same list.
- You can create a column with the type Calculated.
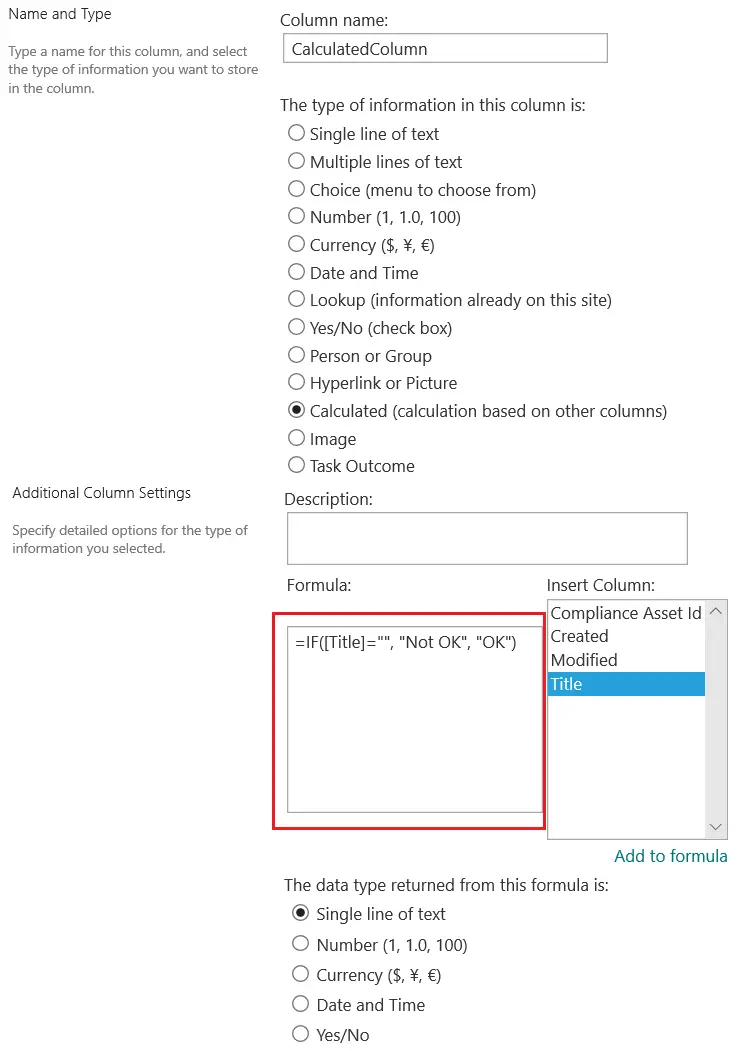
- In the additional column settings – Formula. You can write your own formula. You can use other columns also in that formula.
- The returning value will be automatically saved in this (Calculated) column.
- The returning value of the Calculated column can only be one of the below 5 types.
- Single line of text
- Number (1, 1.0, 100)
- Currency ($, ¥, €)
- Date and Time
- Yes/No
Change list column order in SharePoint
- When you add/edit data in the SharePoint list, you see the column are in a certain order only.
- If you want to change the order in which the columns are displayed to the end-users, then follow the steps.
- Go to SharePoint list/library settings.
- Scroll down to the columns section.
- Click on Column ordering. A page will open with all the editable columns with numbering.
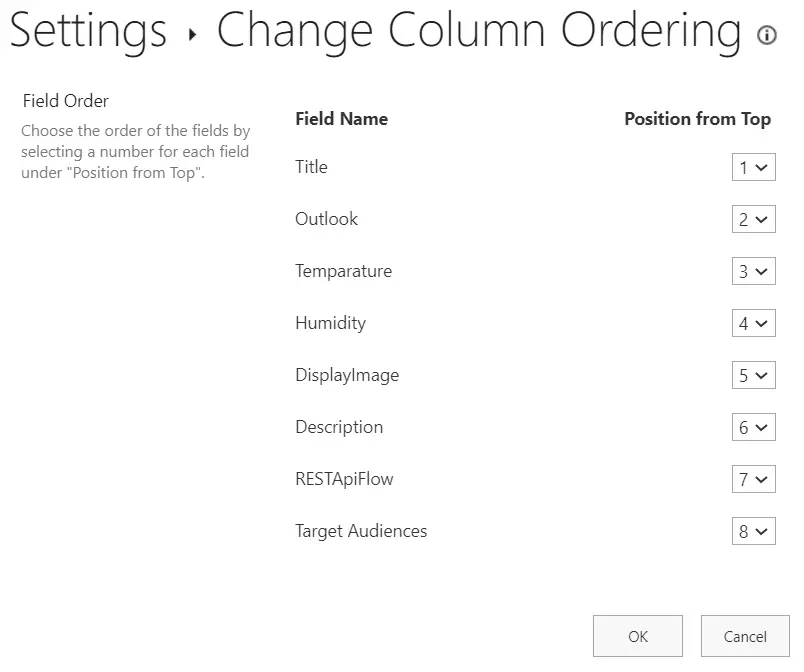
- You can change the order of the columns and click OK.