Writing your first Hello World program in any new technology is always important! We will go through step by step process of creating your first SharePoint Framework (SPFX) client-side web part.
Step-by-step process to create SharePoint Framework (SPFx) Client-side web part
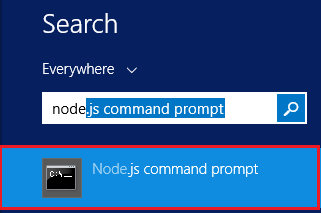
- Open node.js command window from the Start menu.
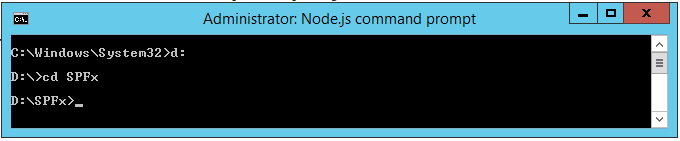
- In the command window, write command and go to your directory where you want to create your solution-project directory.
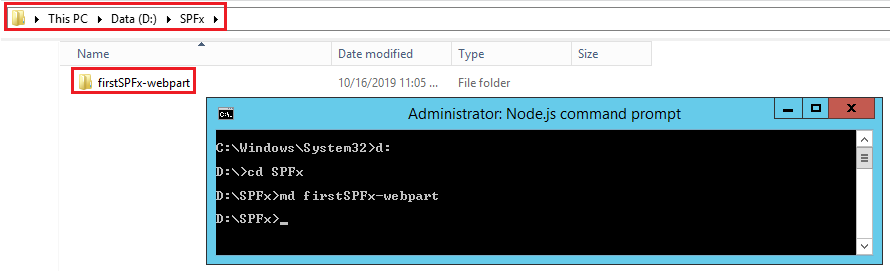
- Now create your project directory using the command md firstSPFx-webpart. You can use your project name.
- As you can see the folder with the specified name gets created.
- Access the project directory using the command:
cd firstSPFx-webpart
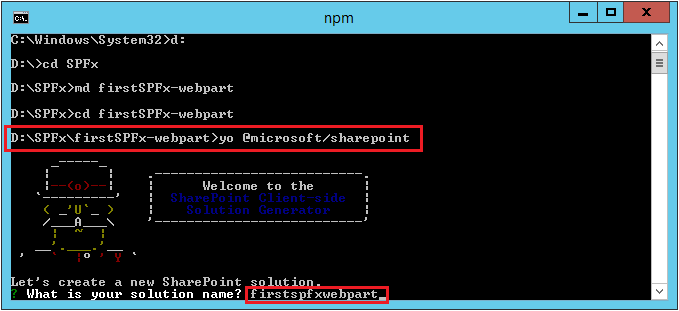
- Now, we will create webpart by running Yeoman SharePoint generator. Run the command:
yo @microsoft/sharepoint
- It will ask a couple of questions:
- What is your solution Name? - firstspfxwebpart (provide as per your requirement)
- Which baseline packages do you want to target for your component(s)? - Select SharePoint Online (Choose according to your requirement).
- Where do you want to place the files? - Use the current folder (we have already navigated to the folder)
- Do you want to allow the tenant admin the choice of being able to deploy the solution to all sites immediately without running any feature deployment or adding apps in sites? – N
- Will the components in the solution require permission to access web APIs that are unique and not shared with other components in the tenant? – N
- Which type of client-side component to create? – Webpart
- What is your Web Part Name? – FirstSPFX (Enter your web part name)
- What is your Web Part Description? - FirstSPFX Description (Enter your web part description)
- Which framework would you like to use? – React (choose according to your requirement)
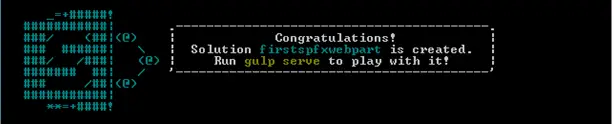
Now, Yeoman will install all the dependencies based on the options entered and create a solution.
Install Developer certificate
The developer certificate has to be installed the first time (and ONLY ONCE) on the developer machine.
Run below command:
gulp trust-dev-cert
Build and preview your web part
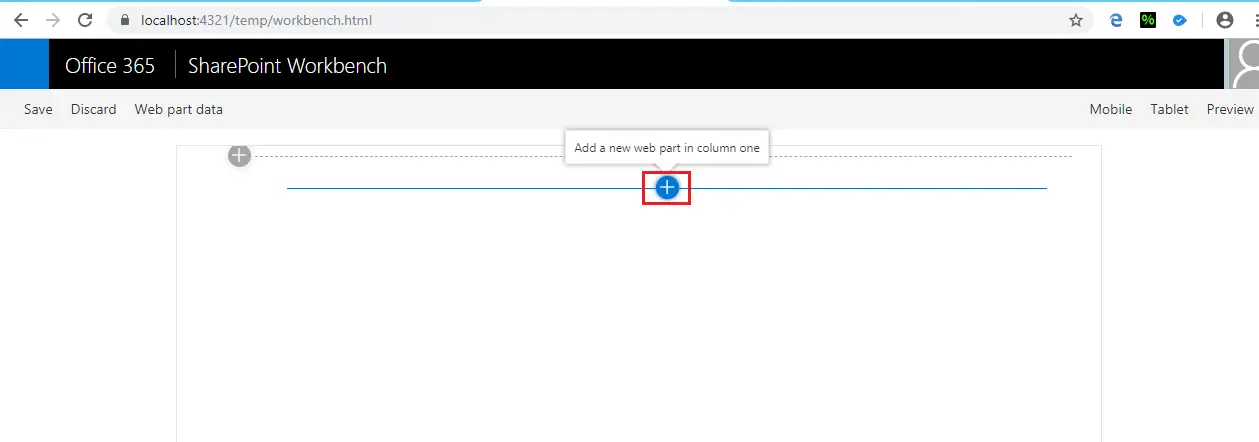
We are going to run and build on the local webserver. In your command window enter below command:
gulp serve
This command creates a node-based HTTPS server on localhost:4321 and localhost:5432. After the execution of the above command, local workbench gets launched in the default browser. You can now preview your webpart in this workbench.
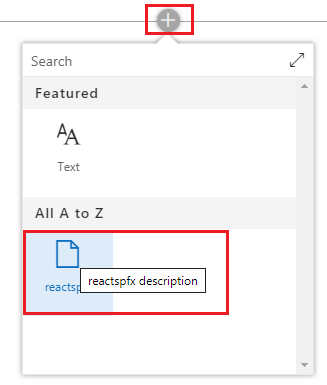
- On the workbench page, click on + to add your webpart.
- You can see your webpart name, click and add it to the page.
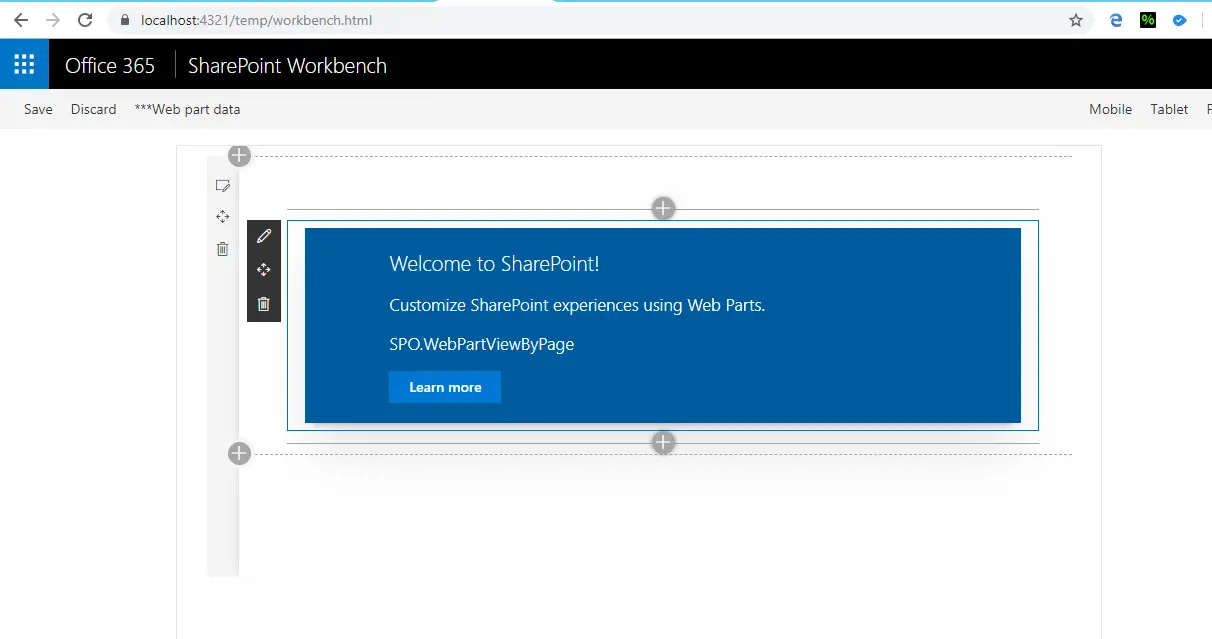
- You can see your webpart on the workbench site.
Open the code editor – Visual Studio code
From the command window, run the command:
code .
This will open the Visual Studio Code.
- In Visual Studio Code Editor, Go to Terminal >> New TerminalOne window will open.

- Click on Terminal Tab. You can also write commands over here.
It is very essential that you understand the structure of the project.
Conclusion
We went through the process of creating the basic SharePoint Framework (SPFx) project.