Content Management is one of the biggest challenges for any organization. An organization keeps lots of documents for its various departments in different locations. Content Organizer feature helps to streamline the process of uploading the document and routing to the target library based on document properties.
Activate Content Organizer Feature
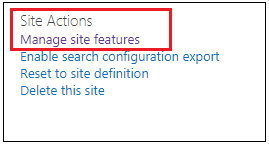
- Go to Site Settings.
- Click on Manage site features under Site Actions.
- Activate Content Organizer Feature

- Activate Content Organizer Feature.
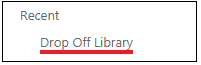
- On activation of the feature, one library called Drop Off Library gets created.
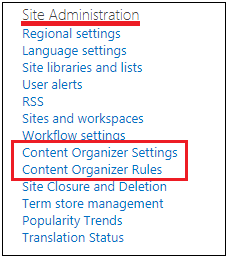
- Two additional links also get created in Site Administration Section.
- Content Organizer Settings
- Content Organizer Rules
There are several settings related to the Content Organizer feature in these two links. Let’s go through each of them.
Content Organizer Settings
You can set content organizer settings for the site over here. There are several options as described below.
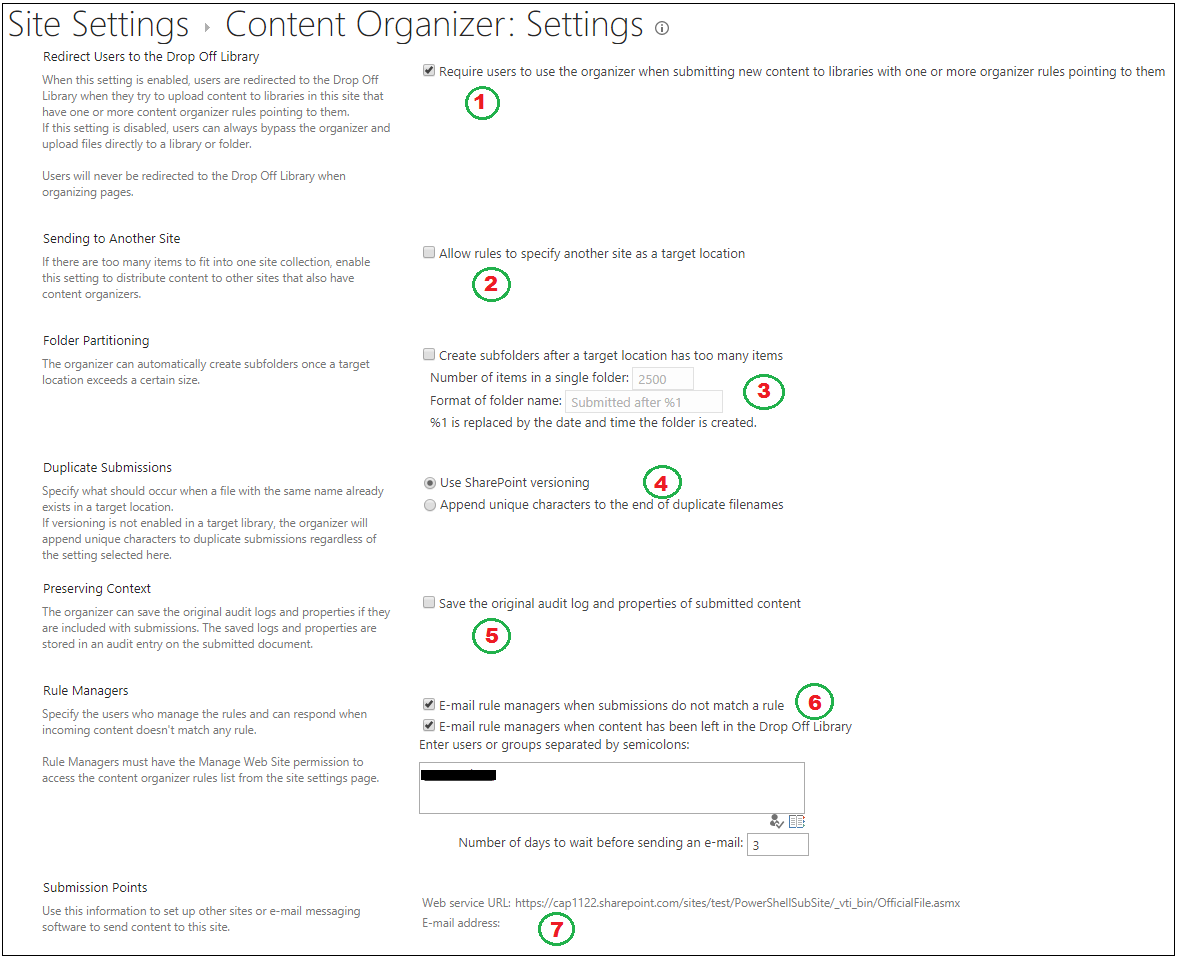
- Redirect Users to Drop Off library – If this option is enabled and if the user tries to upload a document in a document library which is associated with Content Organizer rules then the system redirects content to the Drop Off Library and the document will be treated as per the Content Organizer Rules.
- Sending to Another Site – If you tick this checkbox, you can specify another site or site collection in content organizer rules to rout the content to the specified target location.
- Folder Partitioning – You can create a new folder if the destination folder reaches a certain amount of items. You can specify the maximum number of items in one folder and you can also specify the new folder name structure here.
- Duplicate Submissions – If you try to upload a file with the same name, you have two options to choose from.
- SharePoint Versioning: If a file with duplicate file name is uploaded, a new version of the file will be created.
- Append unique characters to the end of duplicate filenames: In the second option, a new file will be added with some unique characters at the end of the file name so that files are not overwritten.
- Preserving Context: If you tick this checkbox, you can store the audit logs and properties related to submitted content.
- Rule managers – You can send a notification Email to individual users or groups if Document submission does not match a rule or Document is left in Drop Off Library only. You can also specify the number of days before sending an email.
- Submission Points: This is a Web service reference that you can use in an external system to upload documents in this site.
Content Organizer Rules
You can create/edit content organizer rules to help route the documents from Drop Off Library to the destination library mentioned in the rule. There are several options as described below.
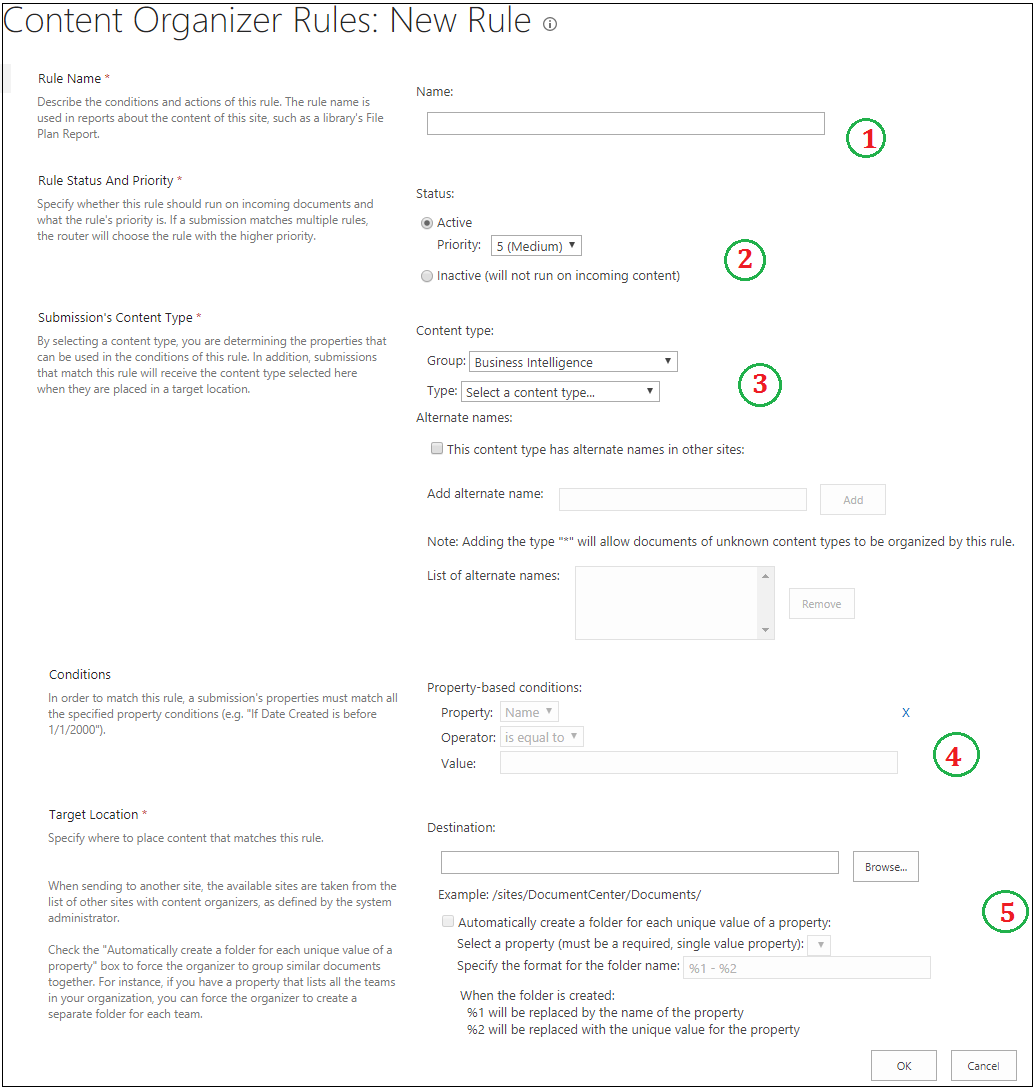
- Rule name - Specify a Name for the rule you are creating.
- Rule Status and Priority – If you set the status to Inactive, the rule will not be applied on the content getting uploaded to the site.
If you set the status to Active, you need to specify the priority of the rule in the drop down. The rule priority value is between 1 and 9 with 1 having the highest priority and 9 having the lowest.
- Submission's Content Type - The selected content type properties will be used in Conditions logic.
- This content type has alternate names in other sites: The content type you are using in this site may have a different name in another site (Target Location of this rule). You can tick the checkbox and Add alternate name in the textbox.
NOTE:
If you add “*” in the textbox, unknown content types will also be allowed to be organized by this rule.
- Conditions – This will allow the user to add a property-based condition. User can add a maximum of six conditions here.
- Target Location – Specify the Target Document library. You can also specify another Site or Site Collection here. If the conditions specified in the above step match to the document getting uploaded, the content will be moved to Target Location.
- Automatically create a folder for each unique value of a property: You can tick this checkbox if you want to create a folder for each unique property-value of an item being uploaded. This feature is very helpful when you want to group similar documents together.
- The property you are selecting must be Required/Mandatory property.
- You can also specify the format of the folder. Refer to the screenshot above.
If you want to use the property name, use %1.
If you want to use the unique value of the property, use %2.
NOTE:
- If the document doesn’t route immediately after you upload the document in Drop Off Library, you can start Content Organizer Processing Timer Job manually or wait for 1 day (as it’s the default time of this Timer Job).
- You can set a maximum of six conditions for every Content Organizer rule.
- Content Organizer is used only for documents so List Item cannot be routed using this feature.
- Even if the user doesn’t have permission on the destination library, if the uploaded document matches the rules, it will be routed to the destination library.
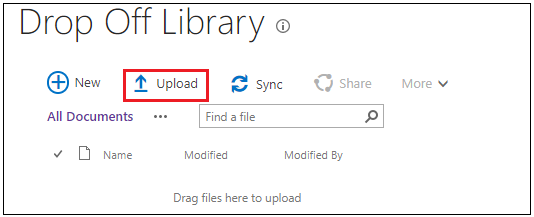
Test: Upload Document to Drop Off Library
After setting content organizer rules, let’s upload a document and check the behavior of the entire process.
- I have set a rule to route document when the document name starts with “a”.
- For testing purpose, the file name aa.docx is used.
- Go to Drop Off Library and Upload a Document
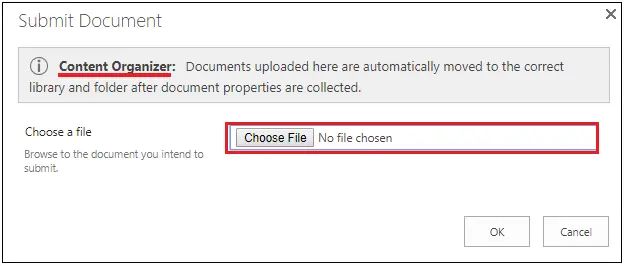
- When you click on the upload button, one pop up will appear to upload a document. You can see a note in the popup menu that according to the Content Organizer Rules, document uploaded in this library will be routed to the appropriate destination library.
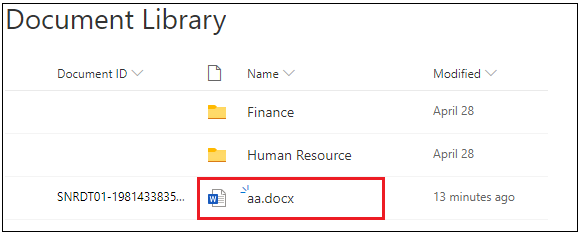
- After you upload the document, all the content organizer rules will be checked against the uploaded document and final popup note will appear with the uploaded document path.

- You can see the document routed/uploaded to the destination library.
Conclusion:
We went through the process of setting up Content Organizer Settings and Content Organizer Rules manually. This is a great document management feature of SharePoint and if used properly, it can reduce lots of effort to streamline content within an organization.