We create sites, we create lots of content and then we forget or don’t bother to edit, delete the content that is very old or that is very irrelevant in present. SharePoint has a very good functionality called Retention Policies to deal with such content.
The steps mentioned to setup Retention Policies in this article are performed on SharePoint Online.
Retention policies are set on four different levels. We will go through each of the four.
- Site Collection
- Content Type
- SharePoint List/Document Library
- Folder
- SharePoint Retention Policy on Site Collection:
This policy will be set up at the Site Collection level and can be used in any of the content types or site within the Site collection. Follow below-mentioned steps to setup site collection retention policies in SharePoint.
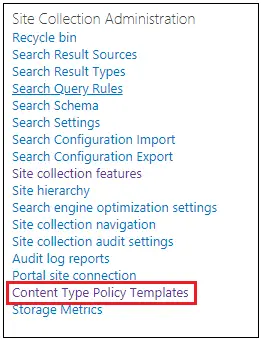
- Go to Site Settings
- Click on Content Type Policy Templates
- Click on Create
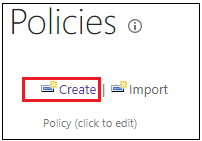
- Policy setup page will open
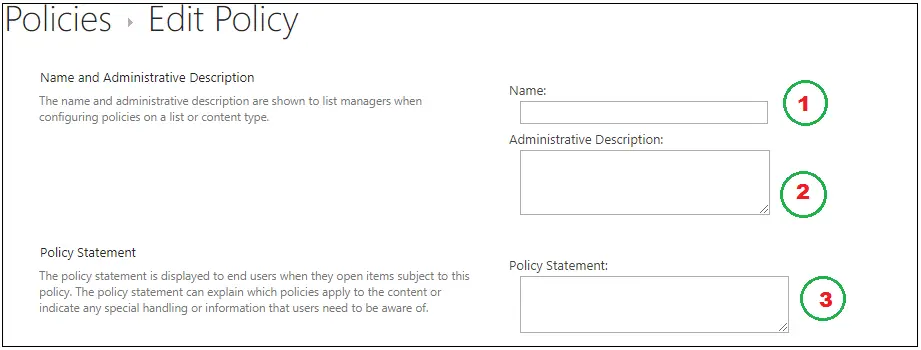
- Enter Name, Administrative Description and Policy Statement. Name and description will be shown into Policy List.
- Tick on Enable Retention Checkbox and click on Add a retention stage...
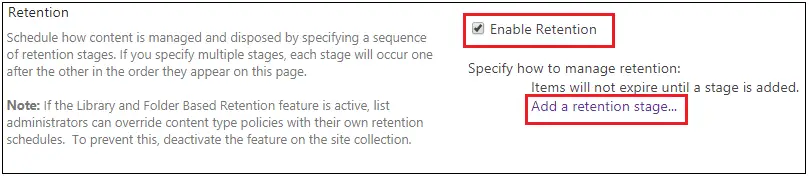
- You can add an event and what action should happen when the event occurs. There are several options for the actions.
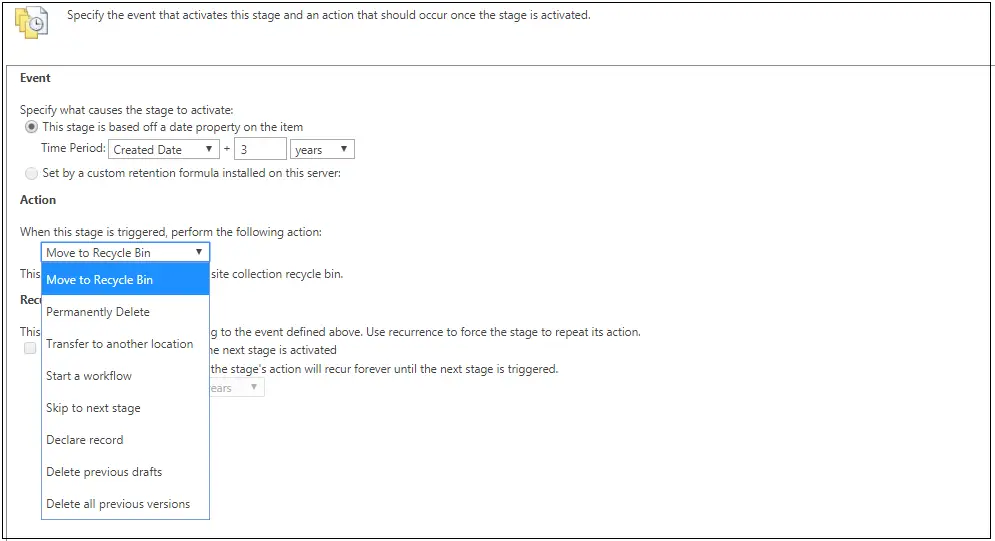
- Click OK to save the policy.
- NOTE: This policy will not be directly applied to the content types or library or folder. We need to select from the respective location. We will cover this in the following sections.
- SharePoint Retention Policy on Content Type:
This policy will affect all the libraries where this content type is used. Follow below-mentioned steps to setup Content Type level retention policies in SharePoint.
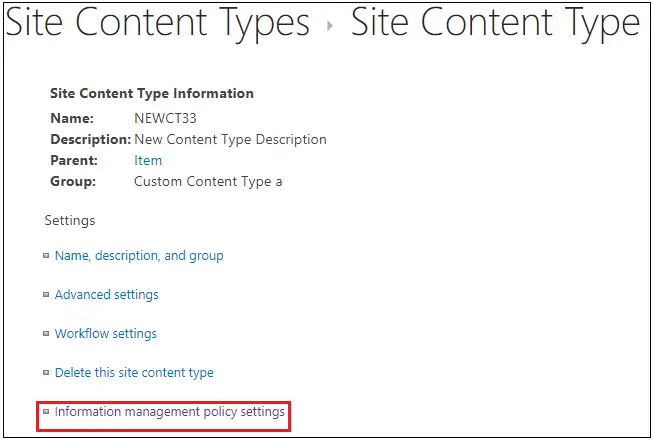
- Go to Site Settings
- Click on Site content types >> click on the content type you want to set the policy on
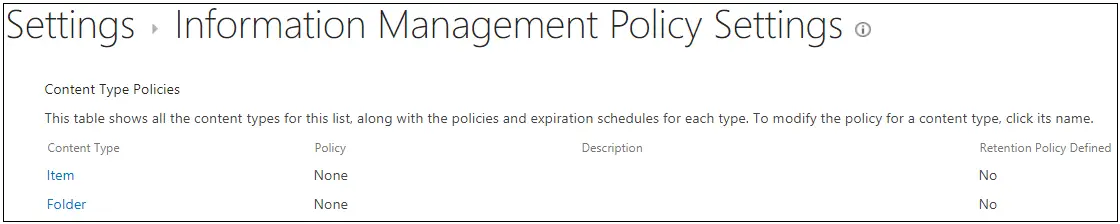
- As shown in below screenshot, click on, Information management policy settings.
- If you have set up a site collection level policy, you will see a screen like below. There are 3 options.
- None: If you don’t want any policy in this content type keep None option selected.
- Define a policy: If you want a separate policy created for this content type, then you can select Define a policy option
- Use a Site Collection Policy: You can choose - Use a site collection policy option if you want to keep the site collection level policy
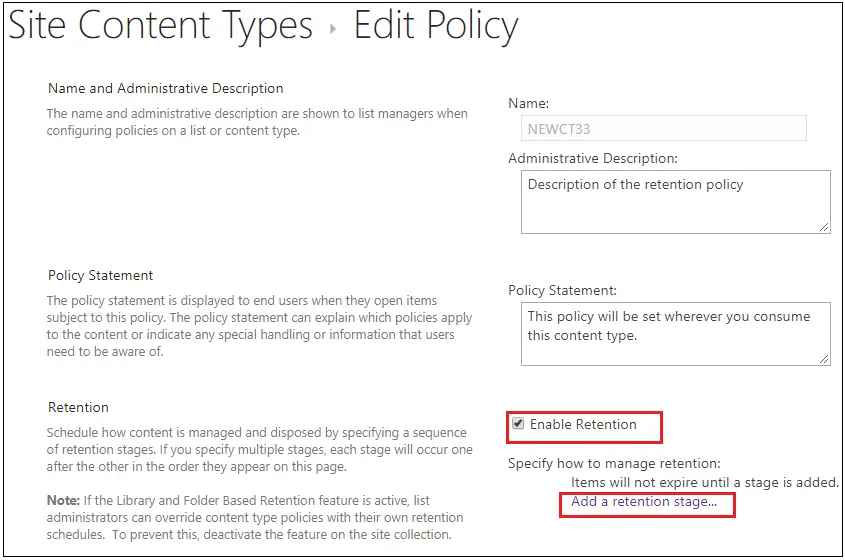
- For now, we will select Define a policy and move ahead.

- For now, we will select Define a policy and move ahead. You will see a familiar screen after clicking OK.
- In the next window, you can again set a retention policy by ticking on Enable retention and clicking on Add a retention stage...
- You can add an event and what action should happen when the event occurs. There are several options for the actions.
- Click OK to save the policy.
- SharePoint Retention Policy on Library:
When you want to overwrite the content retention policy set in site content type by your site administrator, you can set the same at library level as mentioned in the below process.
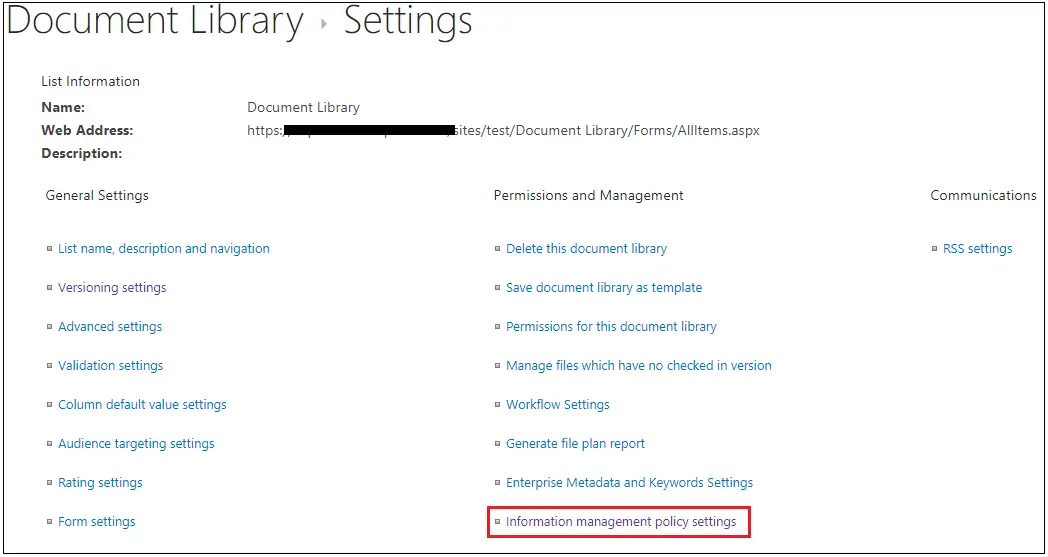
- Go to library settings
- Click on Information management policy settings
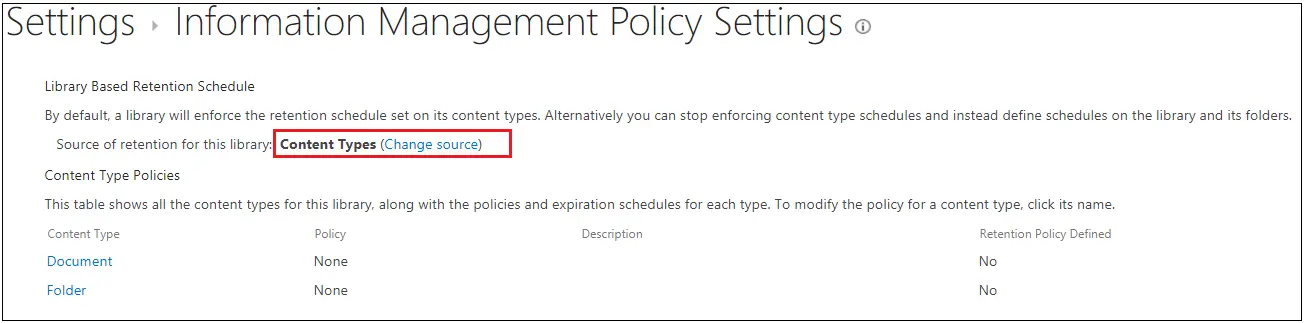
- When you click on the link, below screen appears. It clearly states that right now list/library is using retention policy set at the site collection level. You can setup library level retention by clicking on Change source.
- In the next screen, when you click on Library and Folders, a warning pop up comes with a message.
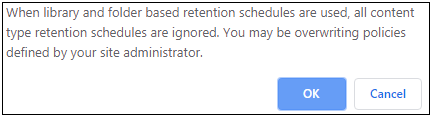
- Click OK to continue.
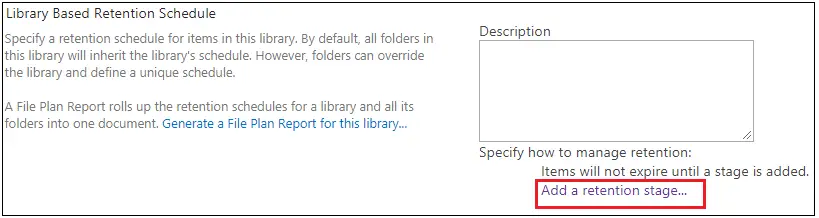
- Now you are all set to continue with library level retention policy process.
- Click on Add a retention stage...
- Click on Add a retention stage...
- You can follow the same process again to add an event and what action should happen when the event occurs.
- Click OK to save the policy.
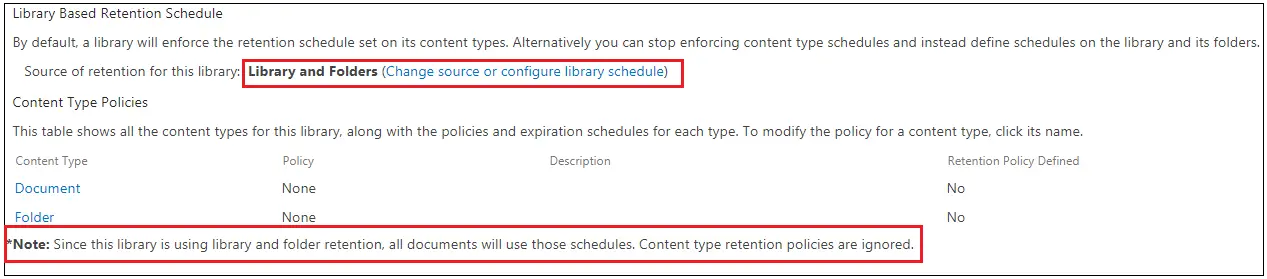
- You can observe the difference at the Information Management Policy Settings page
- SharePoint Retention Policy on Folder:
Now we will look at the last one in the hierarchy, Folder. You can set a separate set of retention policies for each and every folder within list/library. Follow the steps to understand.
- Go to library settings
- Click on Information management policy settings
- Click on Change source or configure library schedule.

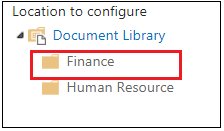
- Click on the folder, you want to set the retention policy on.
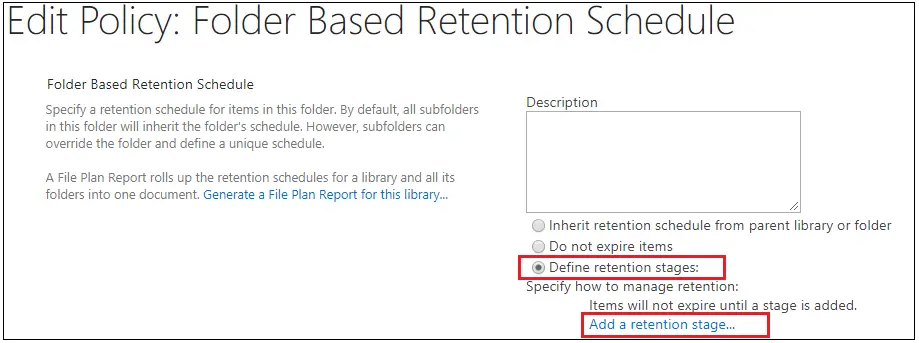
- You will get three options over here.
- Inherit retention schedule from parent library or folder: This option will just inherit the retention policies set at a higher level (list or library level)
- Do not expire items: This option will not Expire items in this folder
- Define retention stages: This will break the inheritance and will define a unique retention policy for the folder. We will select this option and move ahead.
- Click on Add a retention stage...
- You can follow the same process again to add an event and what action should happen when the event occurs.
- Click OK to save the policy.
Deactivate Library Based Retention policy
Library and Folder Based Retention Feature:
This is a site collection level feature that you can disable in order to prevent library or folder level retention policies to be created. If you deactivate the feature, the site level policy will be applied forcefully and you will not get any option to create a policy at list/library/folder level.

After deactivating the feature as shown below, there’s no any option to create a policy in library Information management policy settings
SharePoint Retention Policy Timer Job
Sometimes you will notice that Retention Policies are not working. If you have setup policies correctly, the biggest reason behind this could be Timer Jobs.
Below two timer jobs are responsible for applying content retention policies. Both these timer jobs run on per Web Application level. If you are working on SharePoint On-premises, you can request your Farm administrator to check the status of the jobs, but if you are working with SharePoint Online then you will have to wait for some time after applying policies.
- Expiration Policy: This job processes items that are due for a retention action, such as deleting items passed their expiration date.
- Information management policy: This job performs background processing for information policies, such as calculating updated expiration dates for items with a new retention policy.
Conclusion
We went through various processes of creating retention policies to keep the content in our sites up to date. We also went through the Site Collection Features and Timer Jobs related to retention policies