In this article, we will understand how to create a list item in the SharePoint designer workflow using REST-API POST method. Designer workflows are a very essential part of most of the SharePoint development projects. Let’s see how we can use REST-API POST method in the designer workflow.
The step-by-step process of creating a designer workflow using REST-API POST method
You can check how to create a list item using REST-API programmatically. The same example we have utilized for reference in this article.
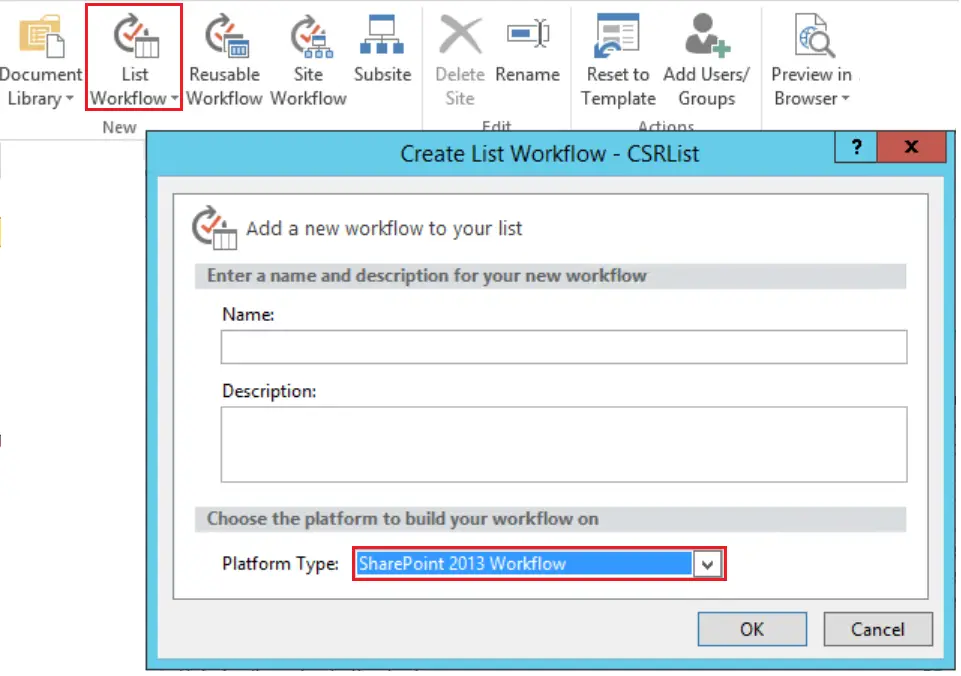
- Open SharePoint Designer. Here, we have shown List workflow. Click on List Workflow from Ribbon and add workflow details. Make sure you select latest platform Type – SharePoint 2013 Workflow
- We need to create a total of three dictionary variables.
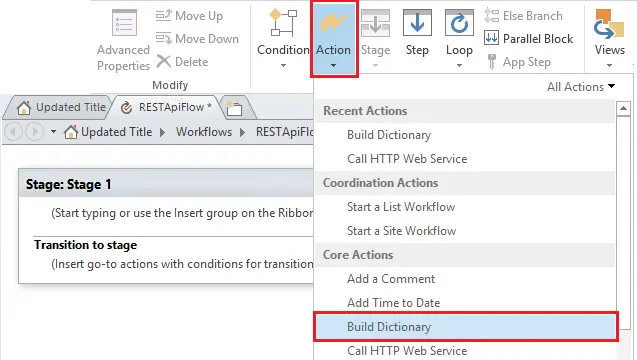
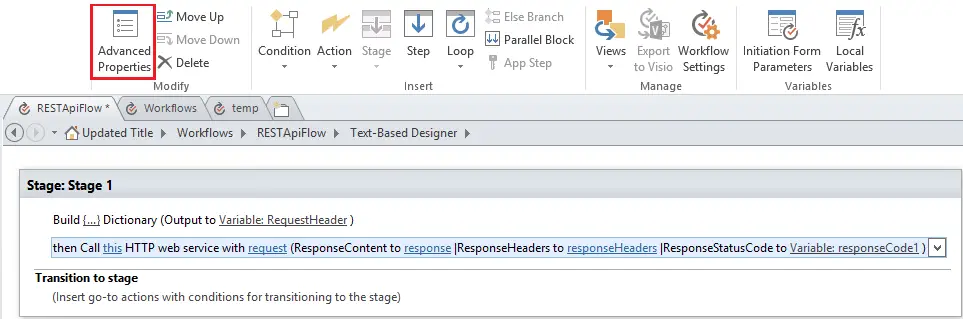
- In Stage 1, click on Action from Ribbon and then from dropdown select, Build Dictionary.
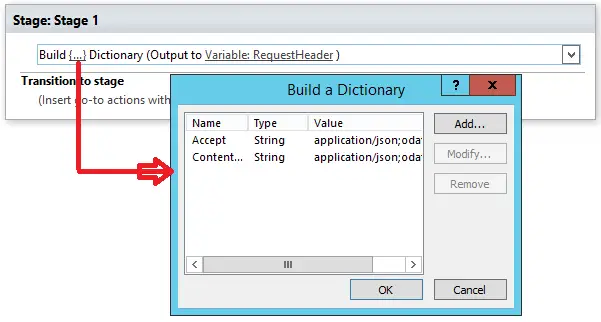
- We are going to create a variable of Type Dictionary and save REST call headers in it. As shown in the screenshot below, click on the ellipsis (…) to build dictionary variable values and add headers.
|
Name
|
Type
|
Value
|
|
Accept
|
String
|
application/json;odata=verbose
|
|
Content-Type
|
String
|
application/json;odata=verbose
|
- We will create one more dictionary to store the “type” value.
NOTE:
The format of the "type" is: SP.Data.<<ListName>>ListItem
Here, the list name is List Name. You need to set the dictionary value according to your list name.
The dictionary value will be as mentioned below.
|
Name
|
Type
|
Value
|
|
type
|
String
|
SP.Data.List_x0020_NameListItem
|
- We need to create one more dictionary for the Request Content for the POST call. Along with __metadata, you can add the columns that you have in your REST call.
NOTE:
- All the column names are internal names of the columns.
- metadata has got two underscores (_) before it.
|
Name
|
Type
|
Value
|
|
__metadata
|
dictionary
|
The dictionary variable created in the above step
|
|
Title (Column Internal Name)
|
String
|
New Title (value for the column)
|
|
Description
|
String
|
New Description
|
- Next, we will add Call HTTP Web Service action.
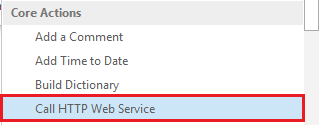
- Select the web service action and then click on the Advanced Properties from Ribbon Menu.
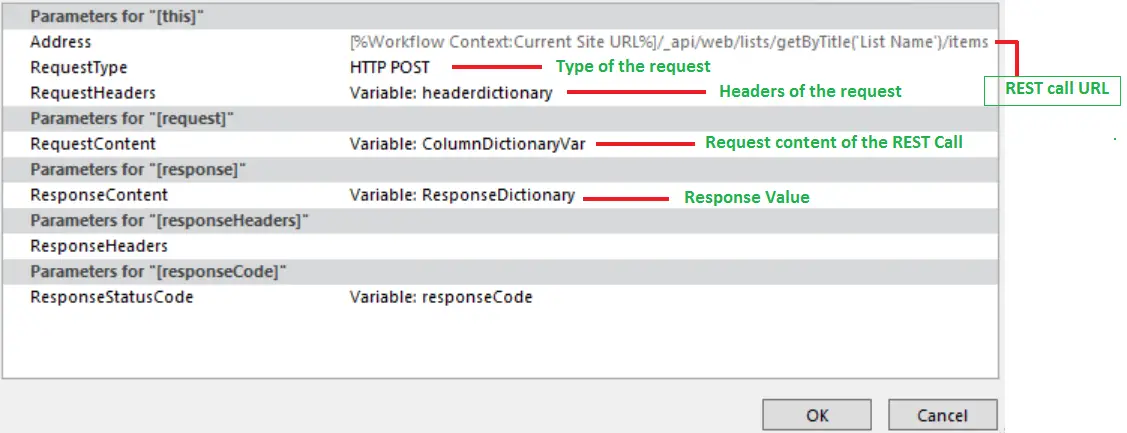
- Now, we will add a few values which are very essential. Here, you are constructing the actual request. Mainly we have added below three parameters.
- Address: This is the REST API URL value. You can construct it according to your requirements.
- RequestType: Here we have used the HTTP POST method as we are creating a list item
- RequestHeaders: This is the headers of the REST call we will assign dictionary value that we created in the first step (HeaderDictionary)
- RequestContent: It contains the dictionary variable for new item metadata, created in the last dictionary variable above.
- ResponseContent: This is a variable of the type Dictionary that holds the data returning by the REST call.
- ResponseStatusCode: This is not mandatory but just kept to check the status of the REST call
- Set Transition to stage add Go to End of Workflow

- Now you can publish this workflow.
- Go to your list and manually start the flow (you can set the trigger of the flow according to your requirement).
- You will notice, a list item is created.

You can check some REST-API examples and create a designer workflow with their reference.
Conclusion:
We have gone through the steps to create a designer workflow and how to create REST - POST request using that.