In SharePoint, you must have faced the requirement where you need different dimensions (width and Height) of the same image to use at multiple locations in site. Image Renditions is an excellent feature in SharePoint that helps to fulfill this requirement.
Prerequisites for Image Renditions
SharePoint Image Rendition may not work if you do not follow some basic prerequisites.
- The site you are working with should be publishing site or publishing feature should be enabled on that site.
- If you are working in SharePoint On-premises, Blob Cache should be enabled at web application level from web config file. If it is not enabled, we cannot access Image Renditions. To enable Blob Cache, go to the web.config file of web application >> Search for BlobCache >> Set attribute enabled to true.

How to create/edit Image renditions?
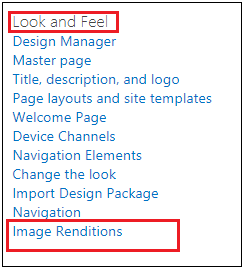
- Go to Site Settings
- Under Look and Feel section >> click on Image Renditions.
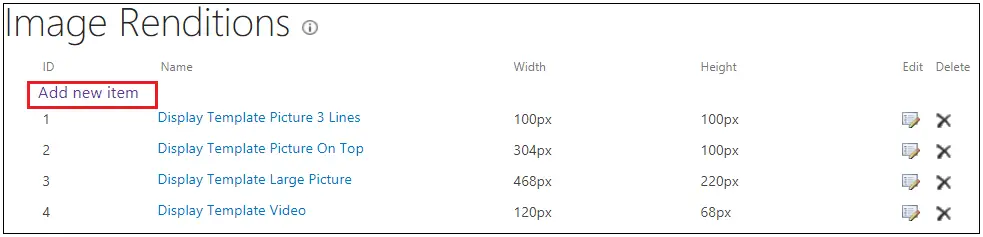
- By default, you will find some items already created with Name, Width and Height columns.
- You can either edit or delete the existing items.
- We will create a new Image Rendition. Click on Add new item.
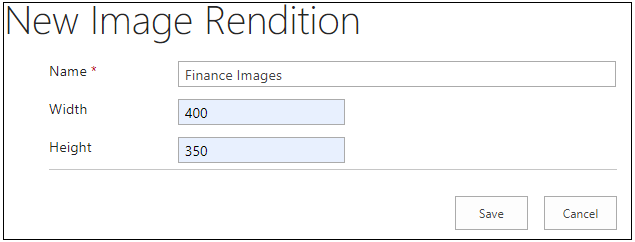
- Add Name, width, and Height of the rendition that you want to create.
- We have got a few Image Renditions. Now we can use them on our site.
- Create an Asset Library. This is just a recommendation; you can also create Image or any other Document library to store Images.

- After creating a library, upload images that you are going to s in your site.
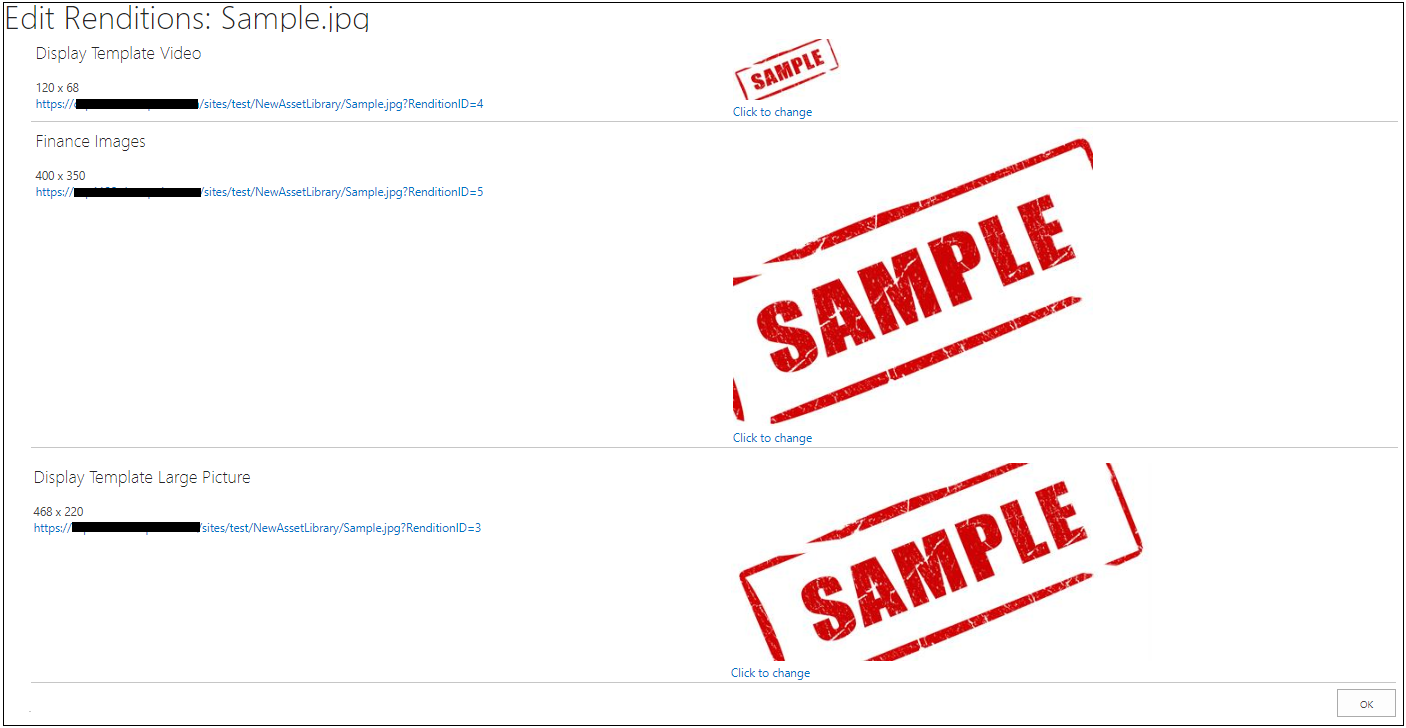
How to view all the renditions?
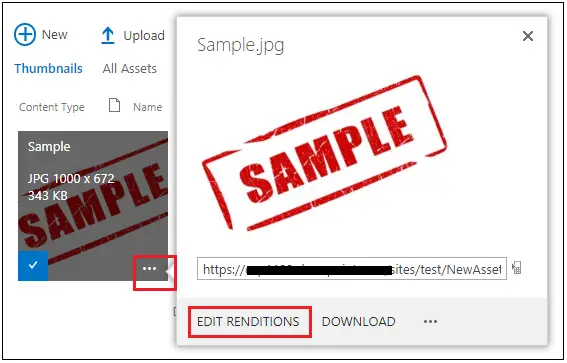
- Go to the library
- Click on ellipsis and open call out pop up. Click on Edit Renditions. It will open the Manage Image Rendition page
- If you are not able to find EDIT RENDITIONS link, you can create a URL like below and use it in the browser. It should directly open the Manage Image Rendition page.
- Example: https://Share11.sharepoint.com/sites/test/_layouts/15/ManageImageRenditions.aspx?ImageUrl=%2Fsites%2Ftest%2FNewAssetLibrary%2FSample%2Ejpg
Syntax: https://ServerName/SiteURL/_layouts/15/ManageImageRenditions.aspx?ImageUrl=RelativeURLofTheImage
- You will see all the renditions of the image.
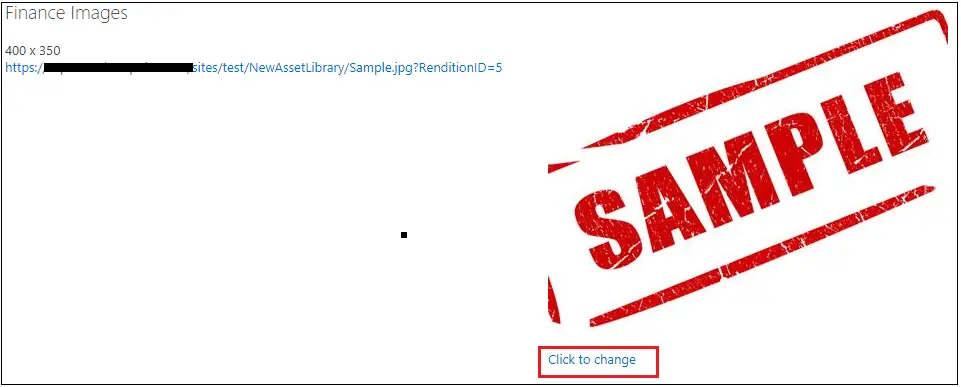
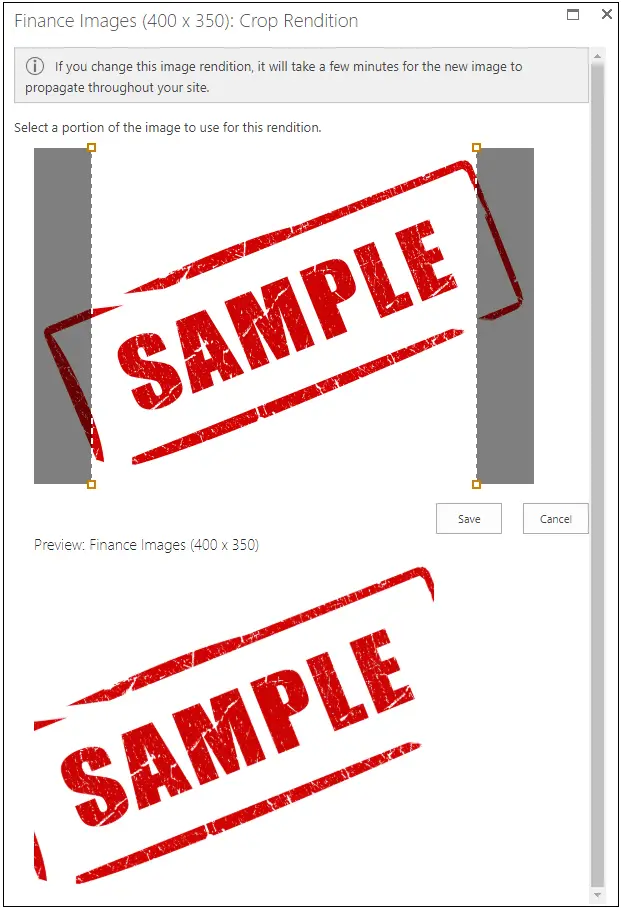
How to crop Image?
- On the Manage Image Rendition page, click on Click to change.
- One page will open and you can crop the image over here. If you change this image rendition, it will take a few minutes for the new image to propagate throughout your site.
- You can crop the image as per your requirement and click on Save.
How to use Image Rendition?
- Create a web part page and add the image which is already uploaded in the document library.
- Now edit the page and click on the Image.
- When you click on the image, you can see in Ribbon bar, Image Tab is opened.
- Click on the Image Tab, you will see another tab in the next line called Pick Rendition.
- When you click on that, you will see all the renditions that you have created.
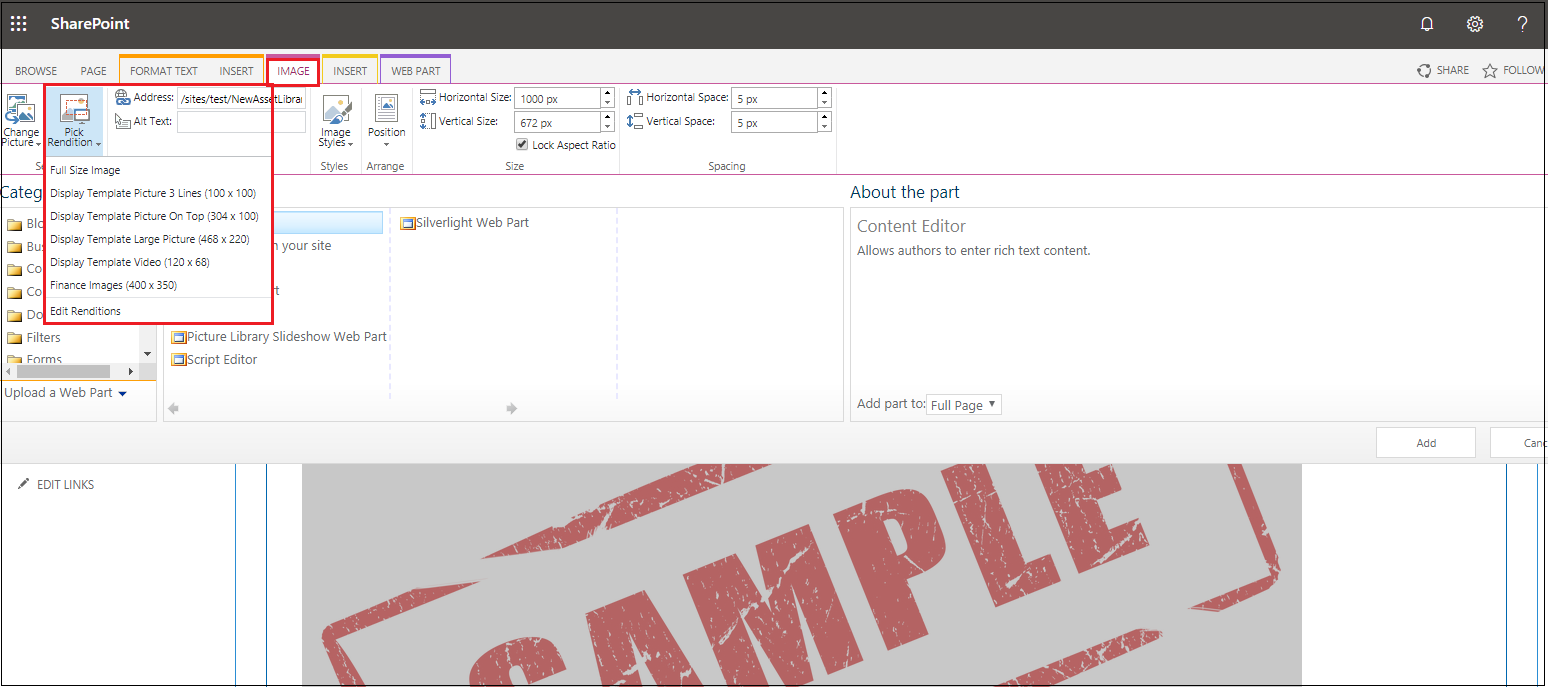
- Select the appropriate rendition according to your requirement and save the page.
Another way to use Image Rendition
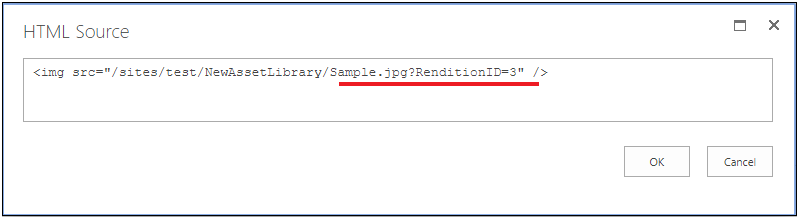
- Every Image Rendition has a Unique Id which is called RenditionId.
- You can specify image rendition by either RenditionID or Width or Height parameter directly in image url like mentioned below.
- Using RenditionId:
To test, put this html code in Content Editor Web part, edit source.
<img src="/sites/test/NewAssetLibrary/sample.jpg?RenditionID=3" />
- Using Width AND Height:
If there are multiple renditions with same width or height, it is advisable to use both parameters in image url to specify the image
<img src="/sites/test/NewAssetLibrary/sample.jpg?Width=700&Height=300" />
- Using Width:
We can use width as only parameter in image url if there is no any other rendition with same width
<img src="/sites/test/NewAssetLibrary/sample.jpg?Width=700" />
- Using Height:
We can use height as only parameter in image url if there is no any other rendition with same height
<img src="/sites/test/NewAssetLibrary/sample.jpg?Height=300" />
NOTE:
If all the three parameters - RenditionId, Width and Height are specified in image url, then image will be picked by Rendition ID.
Conclusion
We went through the process of understanding Image rendition, prerequisites for image rendition, why we need it, how to setup Image Rendition and how to use it.