Web Application is an IIS web site and it is on top position in SharePoint structure/hierarchy. Creating Web Application is first and foremost part of starting development in SharePoint. In this article, we are going to create a web application manually in SharePoint 2013.
Step-by-step process to create web application manually
- Go to Central Administration >> Application Management >> Manage web applications
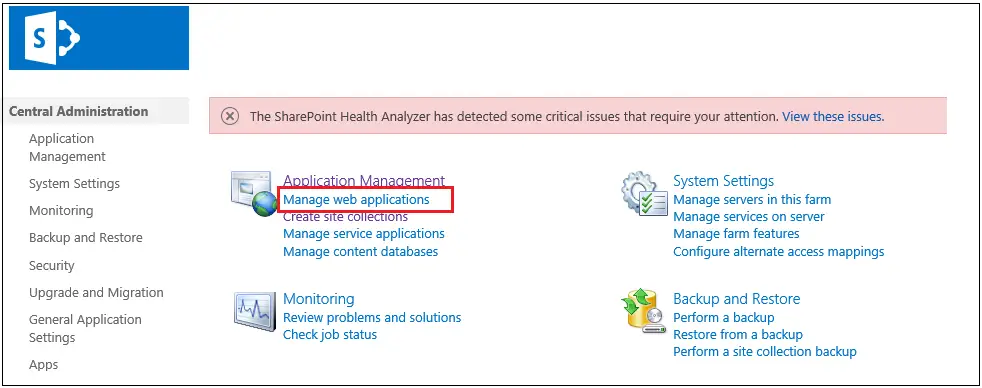
- Click on New Link as shown below
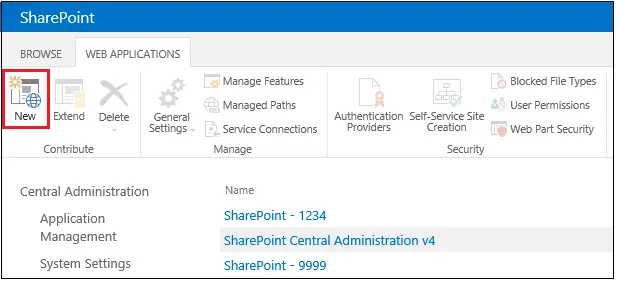
- A form will appear to create a new web application
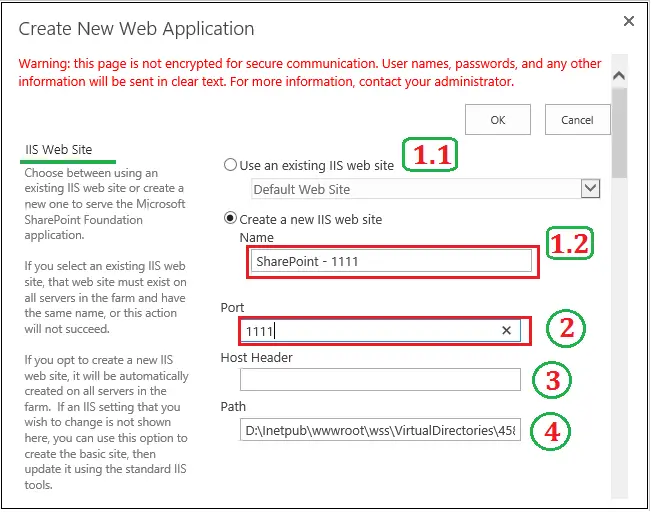
- IIS Web Site:
- Use an existing IIS web site:
If you are using the existing web site. For this option, the existing web site should be present on all the servers in the farm.
- Create a new IIS web site:
If you want to go for a fresh web application, enter a web site name. For this option, the new web site will get created on all the servers in the farm.
- Port –
Enter the port number for the new web application.
- Host Header –
This will allow you to give your site a Domain Name or a Host Name.
You will be able to access your site using a friendly URL. (e.g. http://SharePointsite.net) rather than entering the server name and followed by the port number (e.g. http://destuserver123:2222).
You can leave this field blank and configure the Host header later.
- Path:
This is the path of the location, where the virtual directory of the new web site will get created. Don’t change unless you specifically want the location other than the default one.
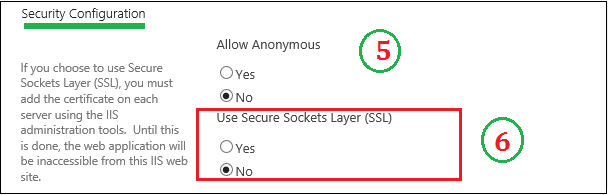
- Allow Anonymous –
If you tick Yes, then Allow Anonymous option will be available to all the site collections created under this web application. Selecting No will disable this option for all the site collections. You can select No and later update as per the requirement.
- Use Secure Sockets Layer (SSL) –
If you tick “Yes”, you must add the certificate on each server in the farm. Until this is done, the web application will be inaccessible from this IIS web site.
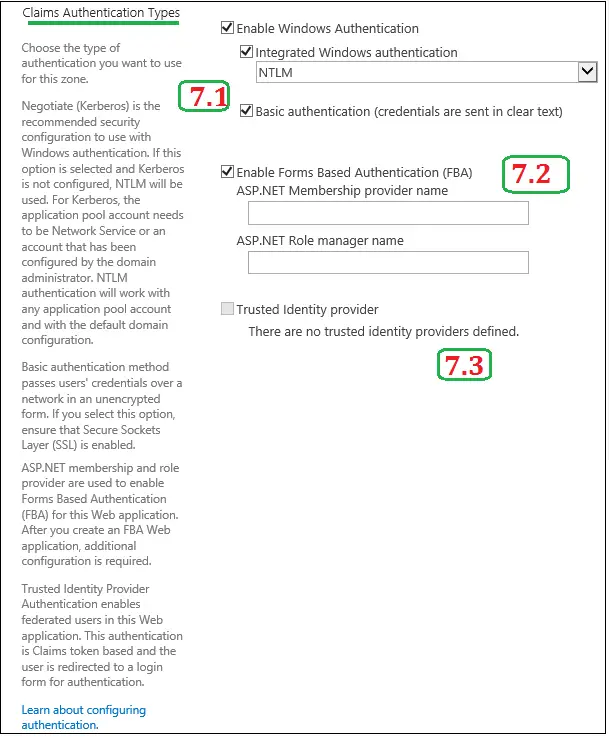
- Claims Authentication Types – Below are the supported authentication types.
- Windows authentication
- Forms-based authentication
Form-based authentication is used to authenticate the user against an identity management system which is NOT WINDOWS BASED. You have to register ASP.NET Membership provider and ASP.NET Role manager in Web.config file.
- SAML token-based authentication / Trusted Identity Provider Authentication

Trusted Identity Provider Authentication enables federated users in this Web application. This authentication is Claims token based and the user is redirected to a login form for authentication.
NOTE: If you do not Enable Windows Authentication, crawling for the Web application will be disabled. So, it is always better to enable the Windows authentication at the time of creating the Web application and later you can configure your Web application to add FBA or any other authentication you want.
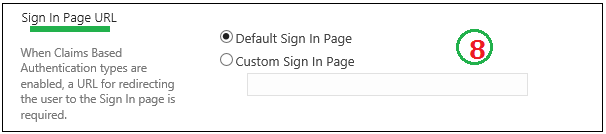
- Sign In page URL
If you are using Claim Based Authentication, a URL is provided to redirect the user to custom Sign In page and you need to provide that page URL over here.
- Public URL

By default, it will be http://servername:Portnumber
- Application Pool
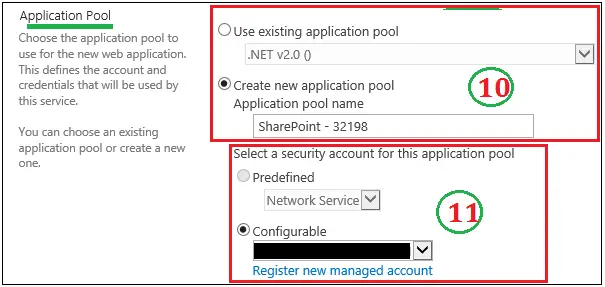
You can either choose any of the existing Application pools or you can create New Application Pool. Application pool defines account and credentials that will be used by this service
- Security account -
Define a security account for this application pool. The application pool will run under this identity. You can change this later from IIS.
- Database name and Authentication
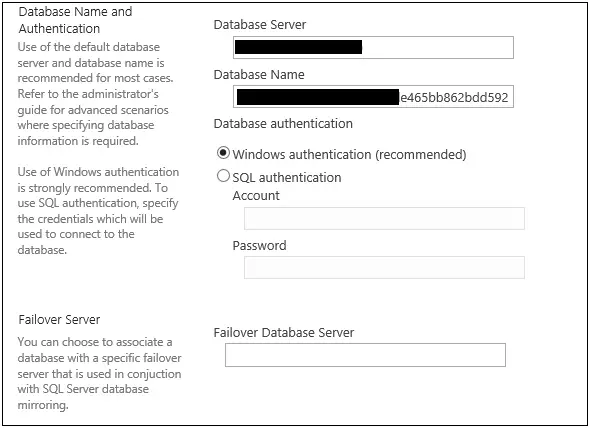
- Database server – Enter the SQL server name where your content database will be created.
- Database Name – Enter the Database name for New web application
- Database authentication - As shown below you can keep windows authentication which is recommended or you can provide Account and password for SQL Authentication
- Failover server – If you have any other server as part of database mirroring, then specify the server name here.
- Service Application Connections
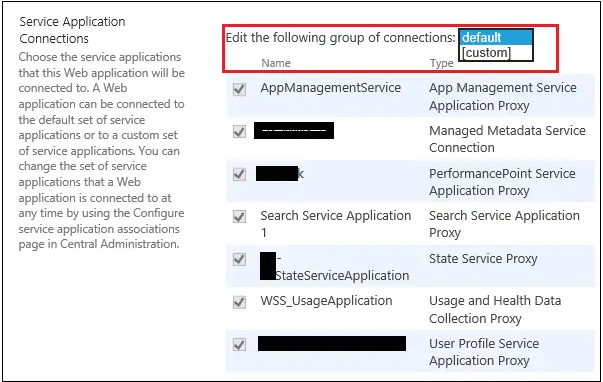
- If you select default, the new Web application will be connected to the default set of services.
- You can choose custom and select the services you want the new Web application to connect to.
- You can anytime change the set of services connected to a Web application by using the Configure service application associations page in Central Administration
- Enable Customer Experience Improvement Program
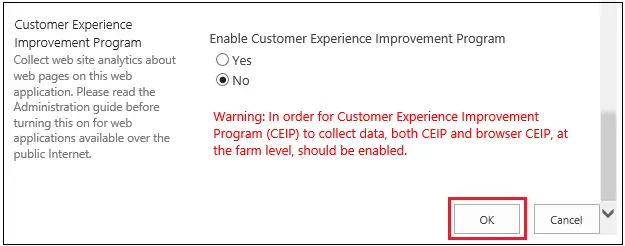
Click OK.
Finally, your Web Application is created and you should be able to see it in your Web Applications List.
Conclusion
We have gone through all the steps and their use/importance in order to create Web Application. The steps mentioned over here were performed on SharePoint 2013 on-premise environment.